As many of you have probably heard, the NSA recently released their reverse engineering tool Ghidra to the public. Ghidra promises a host of features, including: cross-platform support (Windows, Mac, Linux), disassembly, assembly, decompilation, etc. I’m not a reverse engineer by trade, but it’s something that I enjoy as a hobby.
I’ve been wanting to test out Ghidra and I’ve also had some questions about getting into reverse engineering, so I decided to kill two birds with one stone and create an Intro to Reversing post using Ghidra. There are a lot of reverse engineering challenges available on the Internet (See Link Farm).I chose a challenge off of CrackMes:easy_reverse.For the reversing, we’ll use the Kali VM that we setup here.
Initial Setup
To start off with, download and extract Ghidra. Ghidra is written in Java, so make sure you have OpenJDK 11 installed on your system
java --version
If you don’t have Java installed, you can install it using
apt install default-jdk
Depending on which distribution of Linux you are using, the default version of Java may be less than OpenJDK 11. Refer to your distribution’s documentation on how to obtain a newer version if you aren’t running Kali.
Now that you have Ghidra, you need to download the challenge easy_reverse and unzip (Password is crackmes.one).
Tool-set Introduction
Before we begin, let’s go over some basics of the tools that we will be using: Ghidra and EDB (Evan’s Debugger). We won’t get into EDB until Part 2, but it we’ll go ahead and discuss it here.
Ghidra
Like I mentioned earlier, Ghidra is a reversing tool developed by the NSA. Specifically, Ghidra offers disassembly and decompilation. Disassemblers are useful for taking the machine code from an executable and translating it into assembly language. For a quick intro into architecture and assembly language, check here. Once we have access to the assembly code, we can begin the process of reversing. A disassembler offers us a way to view the assembly code, make adjustments (called patching), and generally examine the functionality of an application. Disassemblers can provide other functionality as well. Additional functionality can include things like scripting and decompilation. A decompiler is similar to a disassembler, but it translates into a higher level language, like c. Assembly language is very basic, requires many more lines of code, and can be pretty difficult to read. A higher level language, like c, can be much easier to read.
EDB
Evan’s Debugger (EDB) is a debugger included in the default Kali installation. By translating a binary application’s machine code into assembly code, debuggers provide similar functionality to a disassembler. The key difference between a debugger and a disassembler is code execution. A debugger allows you to run through an application’s code in a controlled way. Of course, debuggers have uses outside of reversing i.e. debugging. Why use one over the other? One reason is that reversing tools that offer disassembly often include additional functionality to aid in reversing (see above). Additionally, it’s often beneficial to examine code without running (especially true when examining malware). We’ll be using both Ghidra and EDB in this tutorial. Ghidra’s decompilation makes things easier to decipher and EDB allows us to watch information as the application executes.
There is one last thing worth noting. Reversing tools (disassemblers, decompilers, debuggers, etc.) are architecture and operating system specific. Because the machine code (instructions) differ between architectures, the disassembly and decompilation is different. Each tool will list the supported architectures and operating systems in its documentation. In our case, Ghidra supports a huge list of architectures and three operating systems (Windows, Linux, and MacOSX). EDB is a Linux application and supports a smaller set of architectures, but does support ours.
Ghidra Setup
Let’s dig in. Change into the Ghidra directory and run the ghidraRun script.
cd ghidra
./ghidraRun
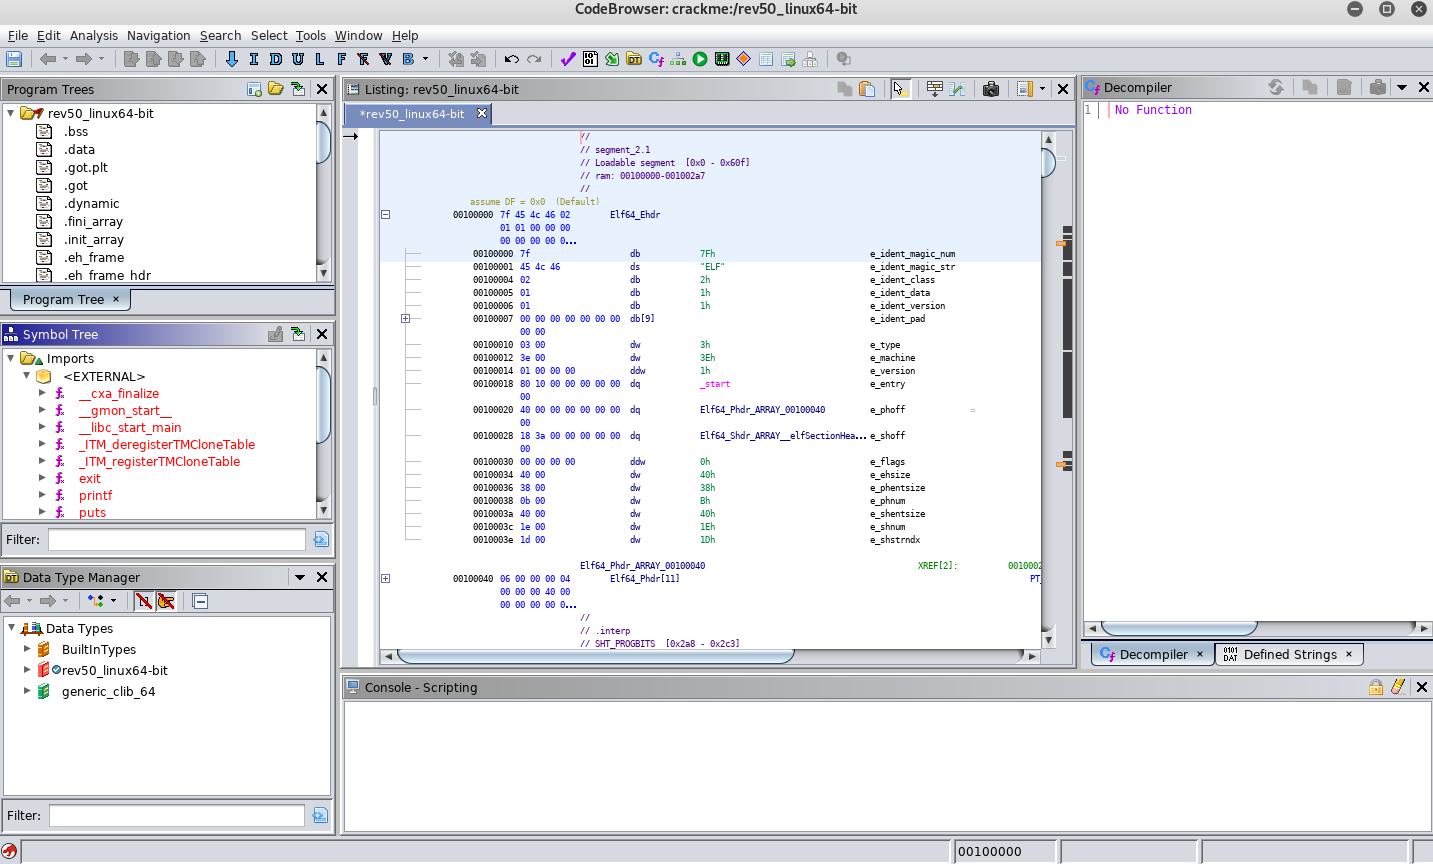
It will take ghidra a few moments to load up. Once it does, you’ll be presented with two windows: the project windows and the help window.In the project window, create a new project by clicking File->New Project. Name it crack_me (We’ll use this project for all of the parts of the tutorial). Once, the project has been created,open the code viewer by clicking the dragon icon in the Tool Chest.

The code view window will open.Import the rev50_linux64-bit file by clicking File->Import and navigating to rev50_linux64-bit. A prompt window will appear defaulting to the ELF format.Leave the default options and click OK. The next pop-up displays information on our file.Look it over and click OK. When asked if you would like to Analyze rev50_linux64-bit, click Yes. Another window will appear, leave the defaults and click Analyze.
Analysis
To start off with, let’s see what this file does.Use the terminal to run rev50_linux64-bit by typing:
./rev50_linux64-bit

We see a similiar result when we add an argument.
./rev50_linux64-bit password

Ghidra
Go back to the Ghidra code viewer and you will see a host of information.
When I first started reversing, I only knew about debuggers and had little knowledge of reversing. My initial strategy involved single stepping (running one instruction at a time) through the code and evaluating as I went (Do Not Do This). Even though I had a decent understanding of assembly language, this was a long and arduous process for even the smallest applications. Over time I learned that some initial analysis could help guide me.
To start our analysis, let’s try to determine some of the functionality of the application by examining the application’s imports. To do so, look at the Symbols window on the left side of the codeviewer. To find the imports, drill down into Imports->External.
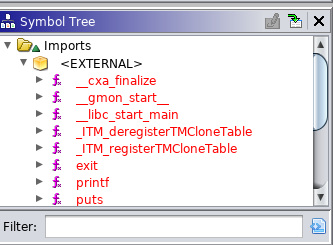
Take note of the following imports:
- printf
- puts
- strlen
Remember that our application displays information on the screen and accepts arguments. Each of these is interesting, but let’s start with printf. Double click printf in the Symbols menu. Notice that the code view has changed.
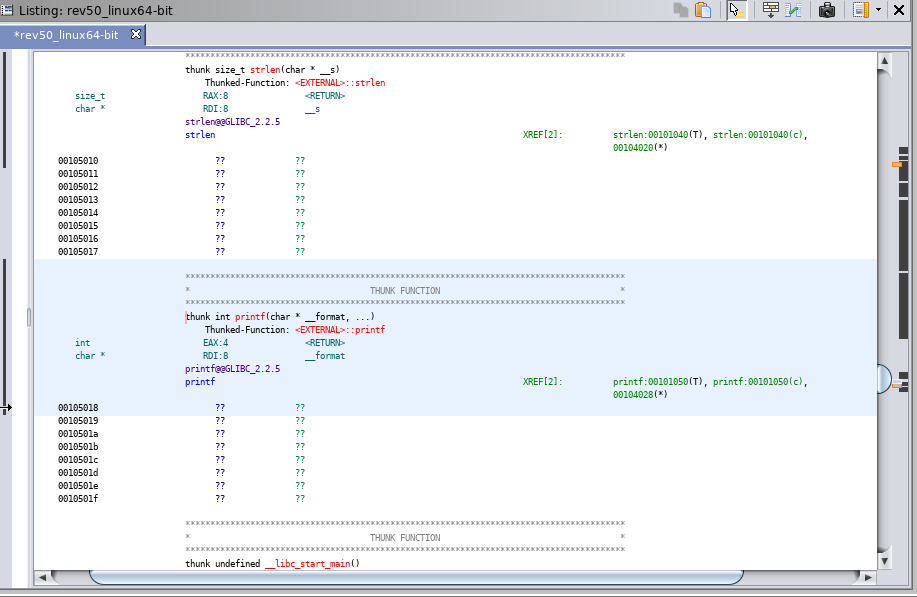
While interesting, we ideally want to find where printf is used during execution. You can jump to places that printf is referenced by double clicking one of the references to the right of XREF (in green). Do this and continue doing it until you find a location in code where printf is used (Hint: watch the decompile window until you see something similar to below). You can go back to the previous screen by using the back button (blue left arrow at the top left of the screen).
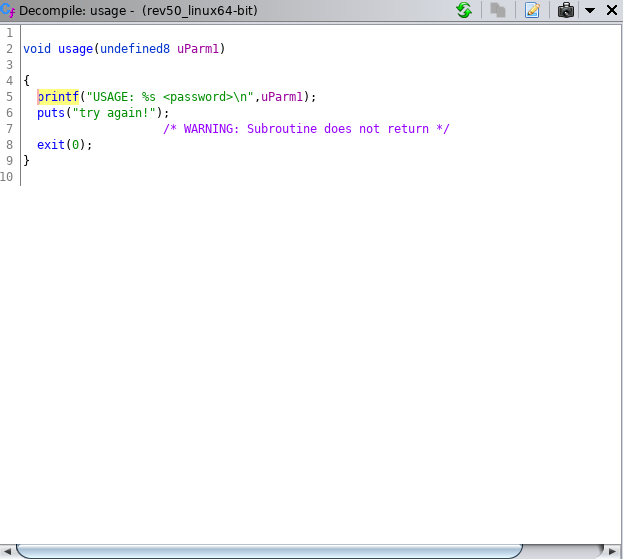
As you can see above, it looks like we’ve found the code segment that prints the usage message. Lets continue looking around for what triggers this piece of code. Do this by clicking through the XREFs for the usage function. You’ll want to continue looking around until you find the code below.
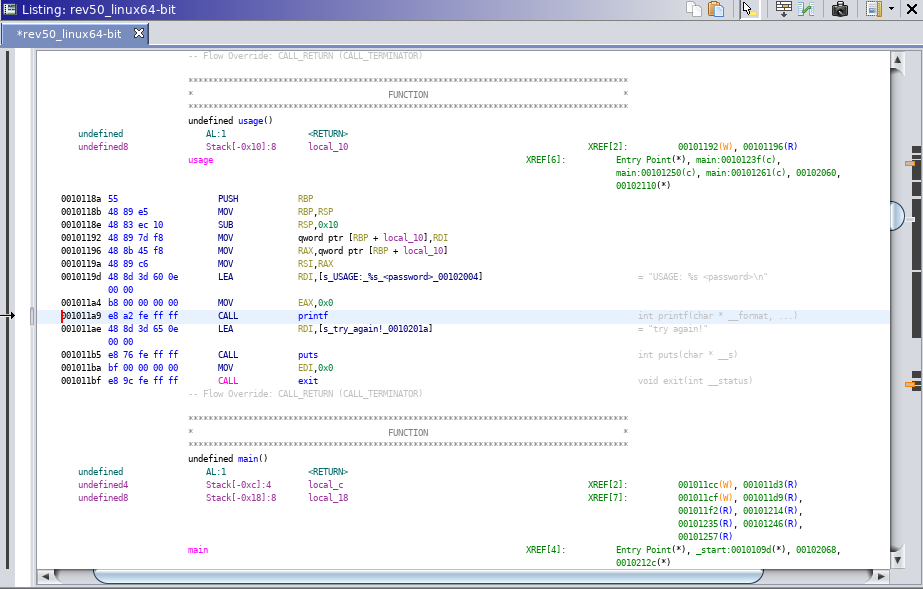
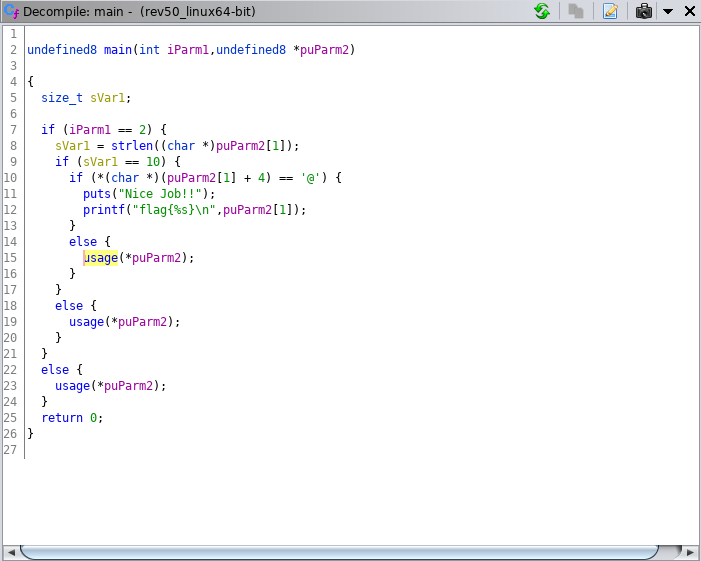
Now that we have the code that calls the usage function. Let’s examine the code.
Look at the first few lines of code before the line with
puts("Nice Job!");
The code starts with a check to see if the length of iParm1 is equal to two.
if (iParm1 == 2)
The next line gets the length of another variable (puParm2[1]) and sets it to sVar1.
sVar1 = strlen((char*)puParm2[1]);
Followed by a check that sVar1 is 10.
if (iVar1 == 10):
Lastly, we see a somewhat strange check for an @ symbol in the 5th position of puParm2[1].
if (*(char *)(puParm2\[1] + 4) == '@' {
Now, we could dig through the code to determine exactly what iParm1 and puParm2 represent, but we can also try a bit of deductive reasoning. Given that we know the application requires an argument or it prints the usage statement, we can hypothesis that iParm1 represents our input in some way. For puParm2, we could hypothesis that this represents our argument since some checks are done against it before the Nice Job message is printed. Given our two hypotheses, we can continue on to make an educated guess that our application checks that we have an argument
if (iParm1 == 2)
that has a length of 10
if (iVar1 == 10):
and has an @ symbol in the 5th position.
if (*(char *)(puParm2\[1] + 4) == '@' {
Using our logic from above, we can make an educated guess that the program will show us the “Nice Job” message if we supply an argument that is 10 characters long and has an @ symbol in the 5th position (ie. aaaa@aaaaa).
Try it out
./rev50_inux64-bit aaaa@aaaaa
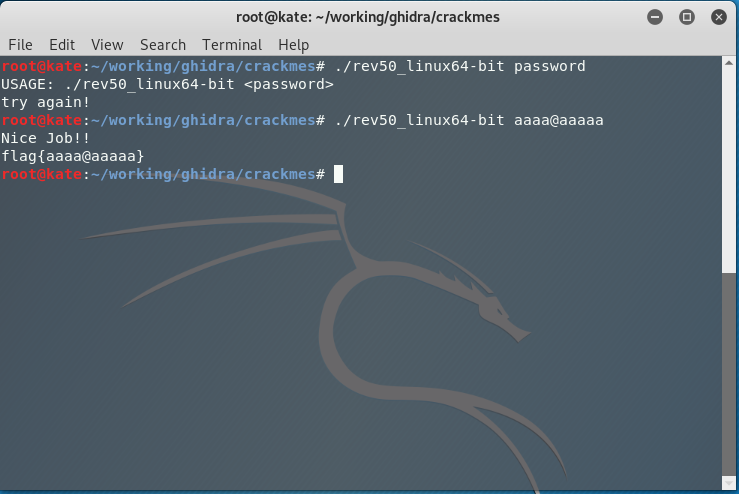
Success! A perceptive reader will note that bbbb@bbbbb or any combination of characters that has the @ symbol in the 5th position and is 10 characters long will work.
Closing
Congratulations on completing your first challenge! For this exercise, we were able to determine everything we needed with relative ease using Ghidra. In Part 2, we’ll start with Ghidra and pivot into EDB for our solution.