In Malware Analysis Part 1, we started analyzing a sample of the Jigsaw malware. Now, we’ll continue to explore Jigsaw using Dynamic Analysis in the Windows environment that we setup in the last post.
VM Prep
Before we begin, make sure that the Windows VM has the network adapter disabled:
Settings -> Networking -> Uncheck Connect Network Adapter
and that shared folders are disabled:
Settings -> Sharing -> Uncheck Enable Shared Folders.
Also, make sure that your Windows protections are still disabled. If you have reset the VM since Learning Cyber 3, then you will need to disable Real-time Protection again as Windows automatically turns it on.
Lastly, make sure you create a snapshot before you execute Jigsaw so that you can revert to it.
Running Jigsaw
To start with our analysis, let’s run Jigsaw by itself by double-clicking it. You may get a couple of prompts. Just click Run or OK on each of them.
At this point, nothing will seem to be happening. After a minute or two (You shouldn’t have to wait more than 3 minutes). You’ll see a screen like the one below.
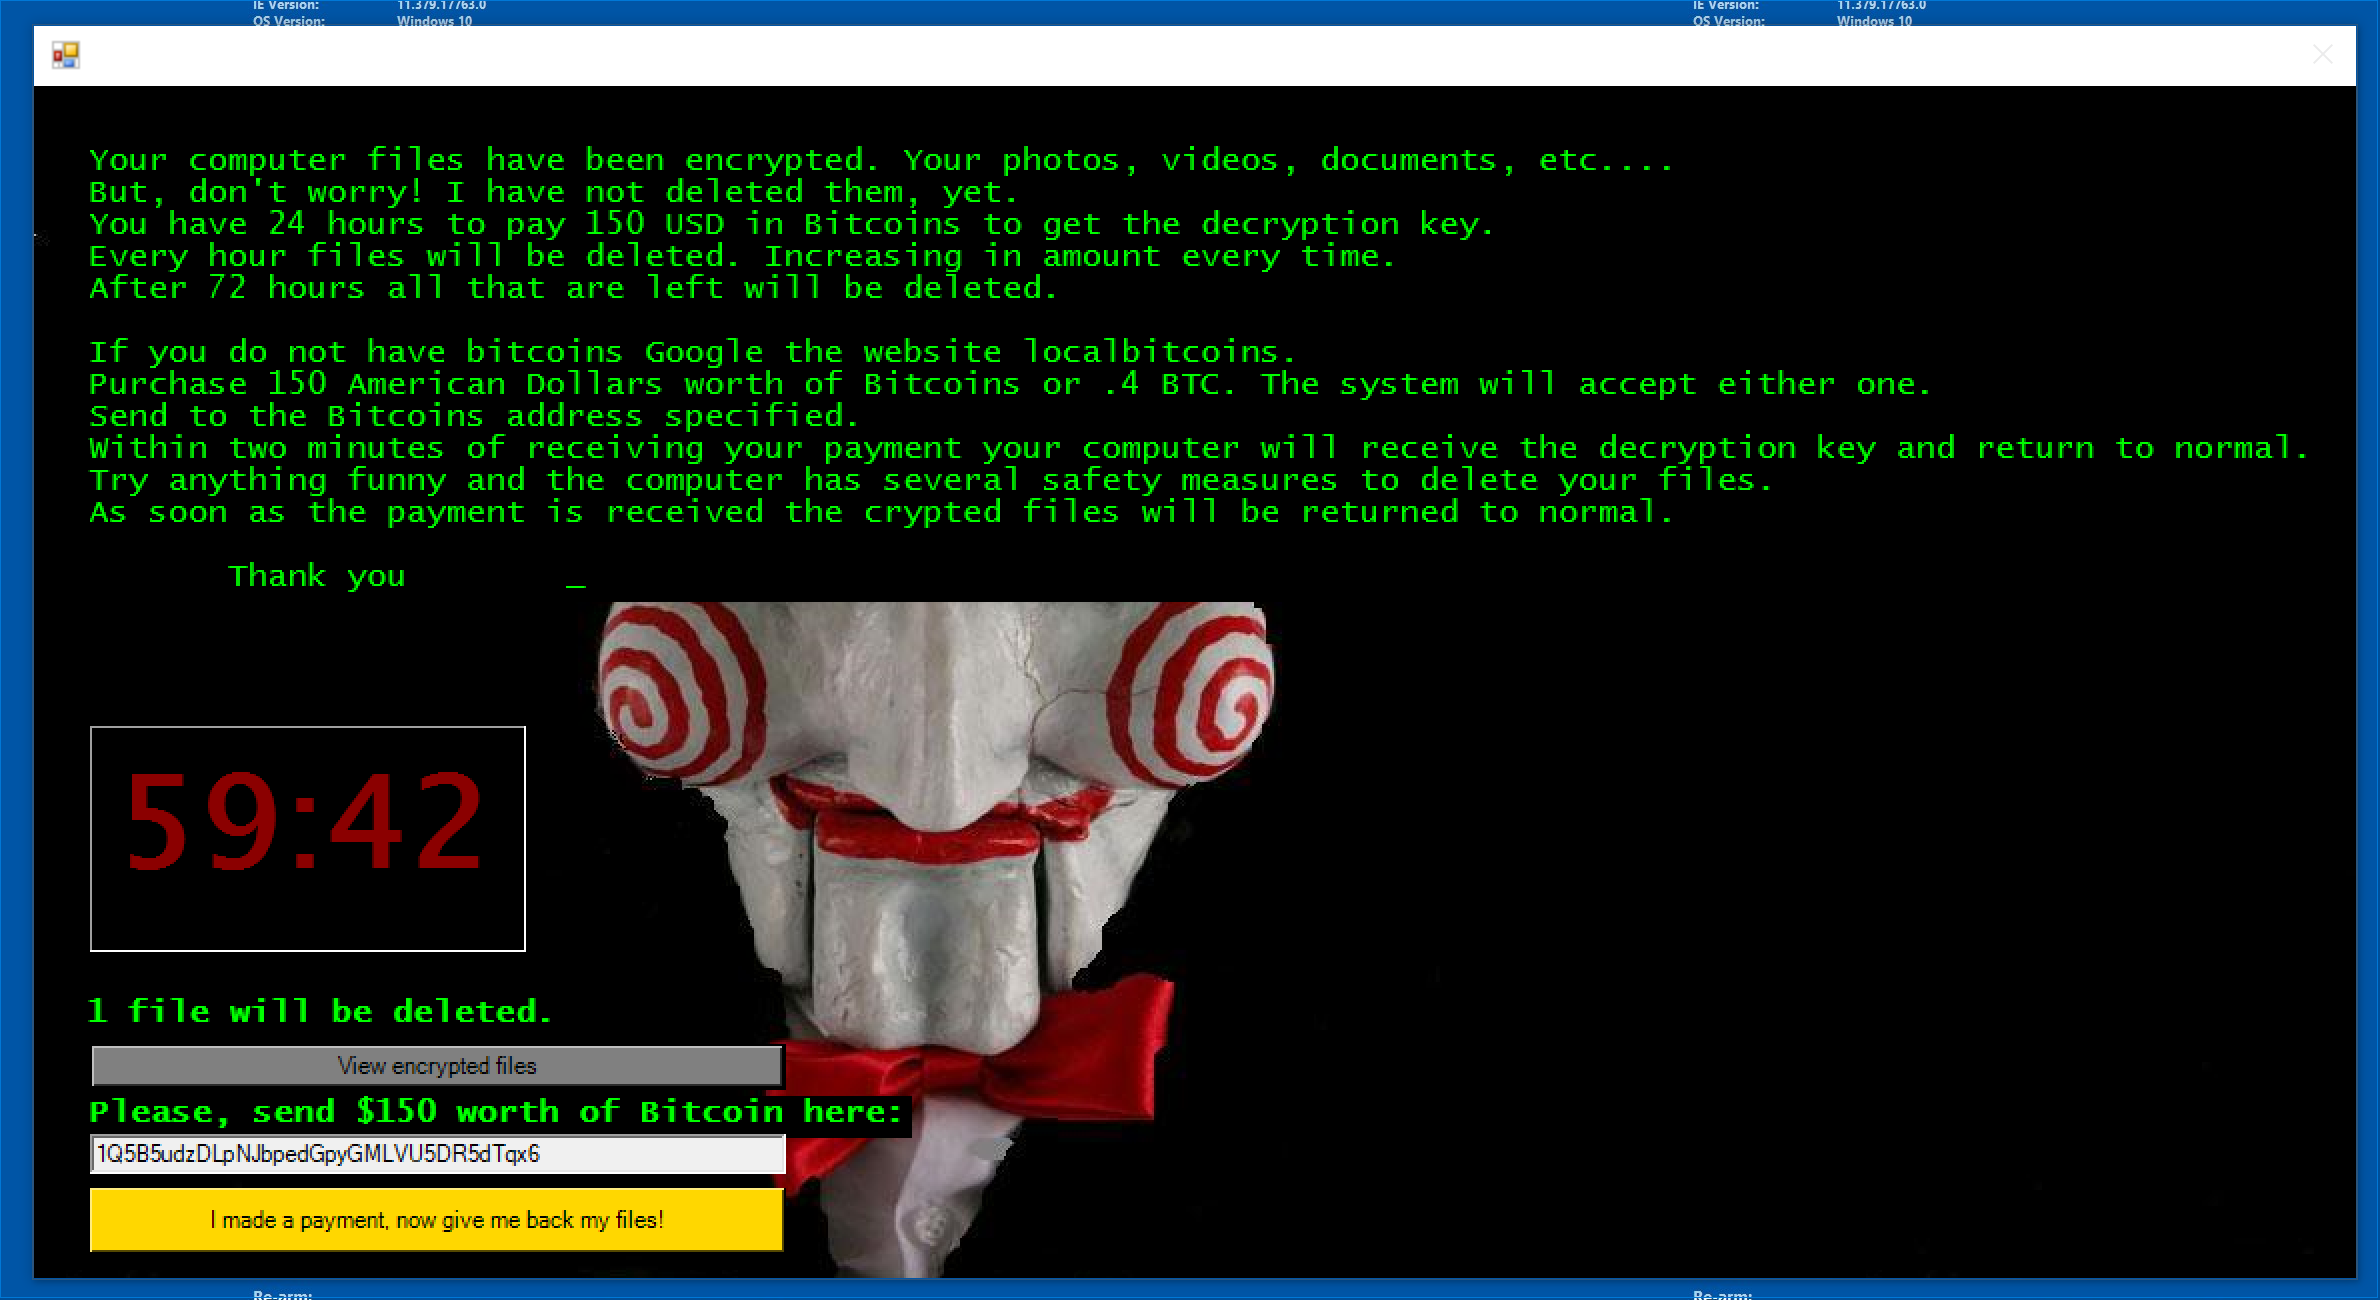
You can view the Encrypted Files by clicking View encrypted files on the Jigsaw window. Play around with it for a few minutes and then reset the VM.
Snapshots -> Restore Snapshot. Click Don’t Save when prompted.
Now that we’ve seen Jigsaw in action, let’s use some of the tools that we downloaded in Learning Cyber 3 to analyze the malware.
First, open Process Hacker by double clicking ProcessHacker.exe. You’ll see an output similar to below.
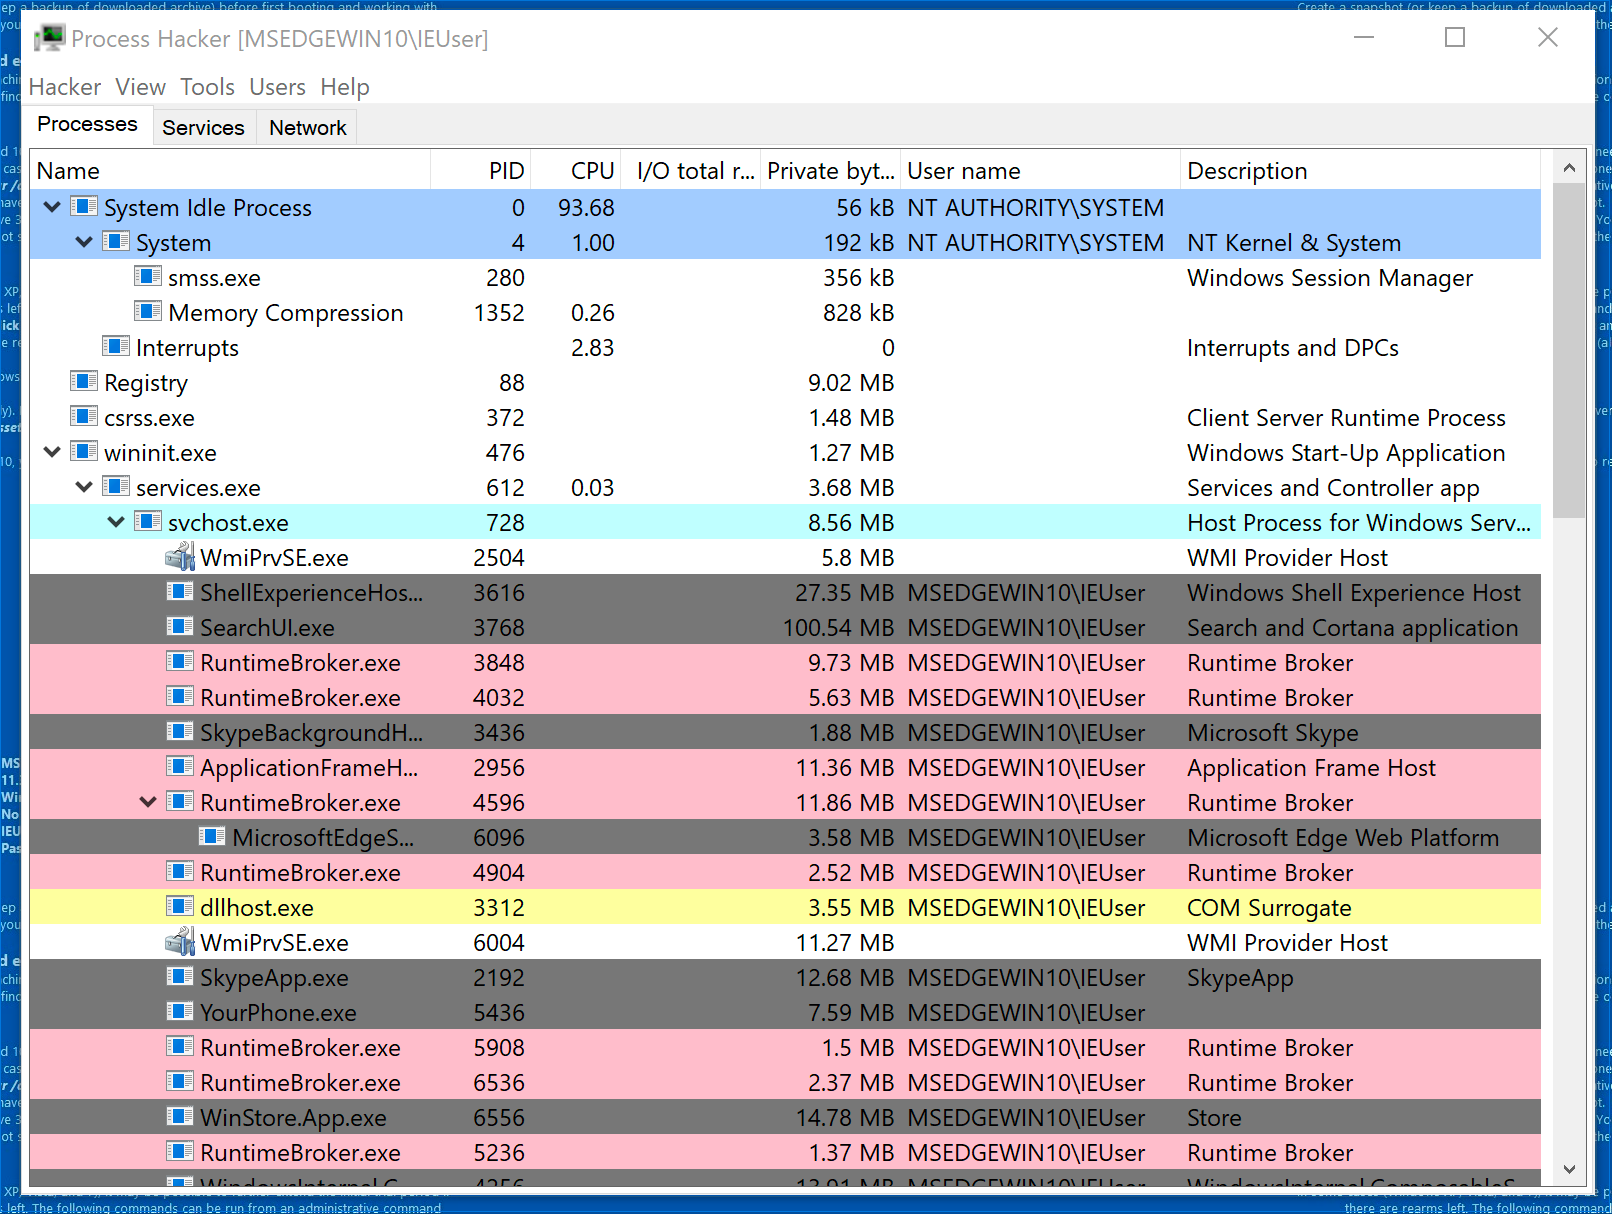
Process Hacker
Think of Process Hacker as a Task Manager on steroids that offers lots of other features. We’ll go over a few of these features below:
Parent-Child Relationships
Process Hacker presents the relationship between processes and their parents or children. Often, a process will create another process. Consider System and smss.exe above. In this case, System is the parent and smss.exe is the child. This is important for detecting anomalies. For example, it’s anomalous for Microsoft Word to create a child process for cmd.exe. This is a common technique that malware utilizes.
Process Information
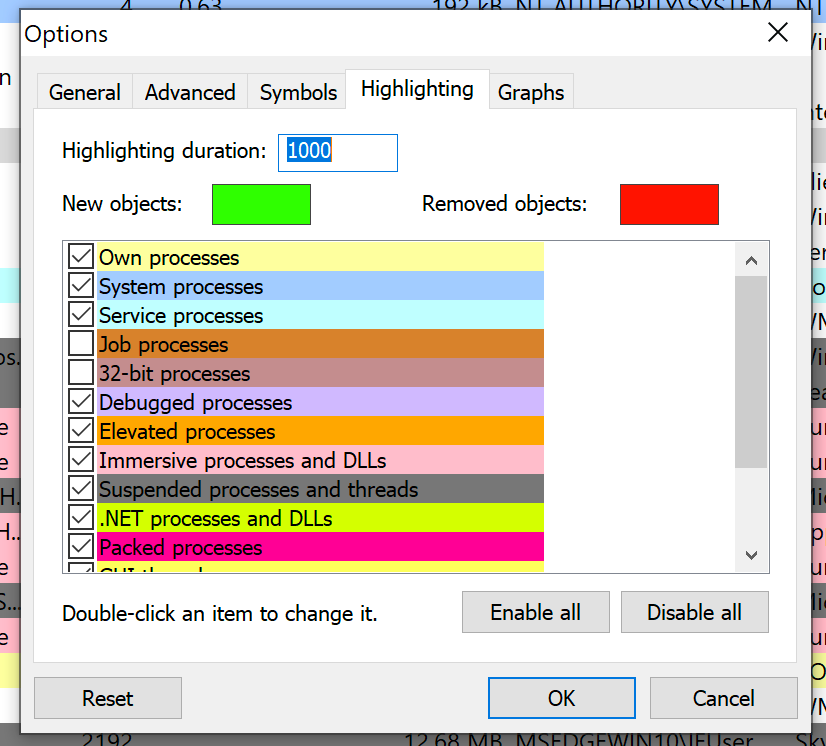
The highlighting of each process represents different types of processes. You can view the rules for highlighting by clicking
Hacker -> Options and selecting the Highlighting tab at the top.
Strings
Like PEStudio, ProcessHacker has a Strings function.
Evaluating Jigsaw with ProcessHacker
Minimize the process trees for each of the processes by clicking the small arrow next to some of the processes. The will hide the child processes. Maximize the process tree for explorer.exe so we can see what happens when we run Jigsaw.
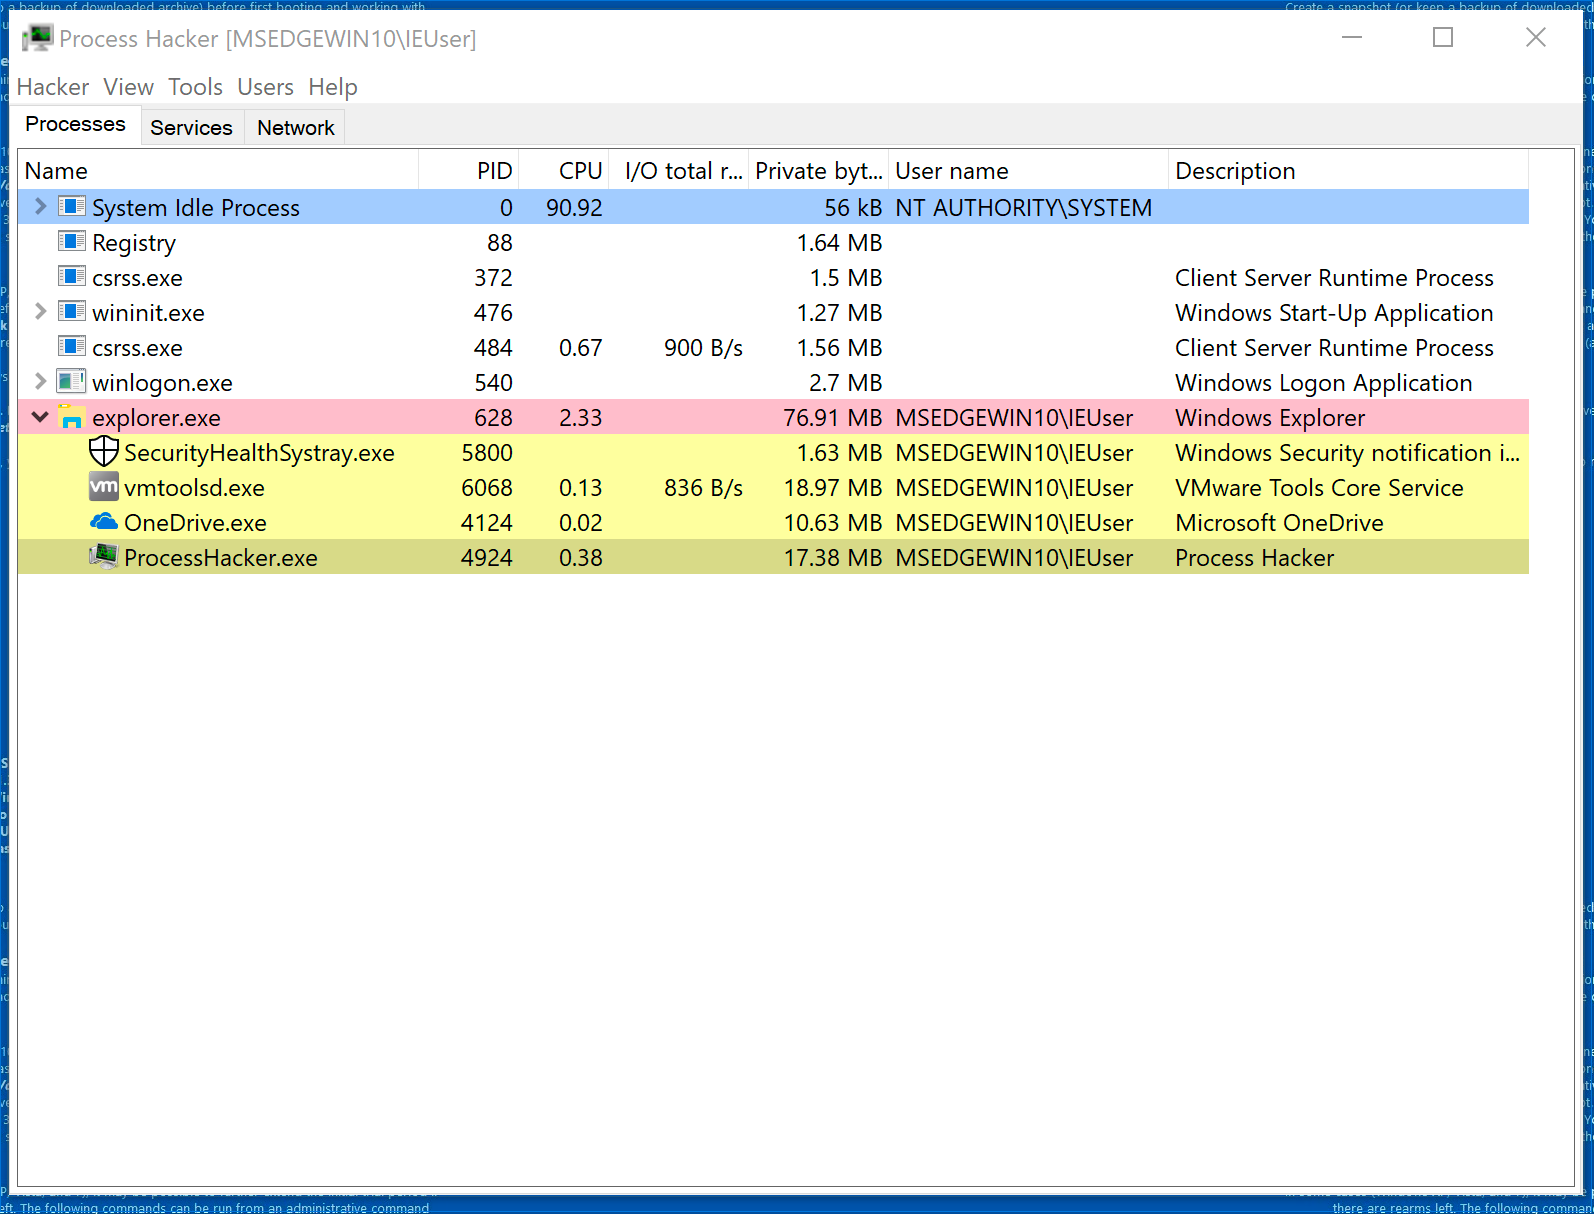
With ProcessHacker open, double-click Jigsaw.exe.
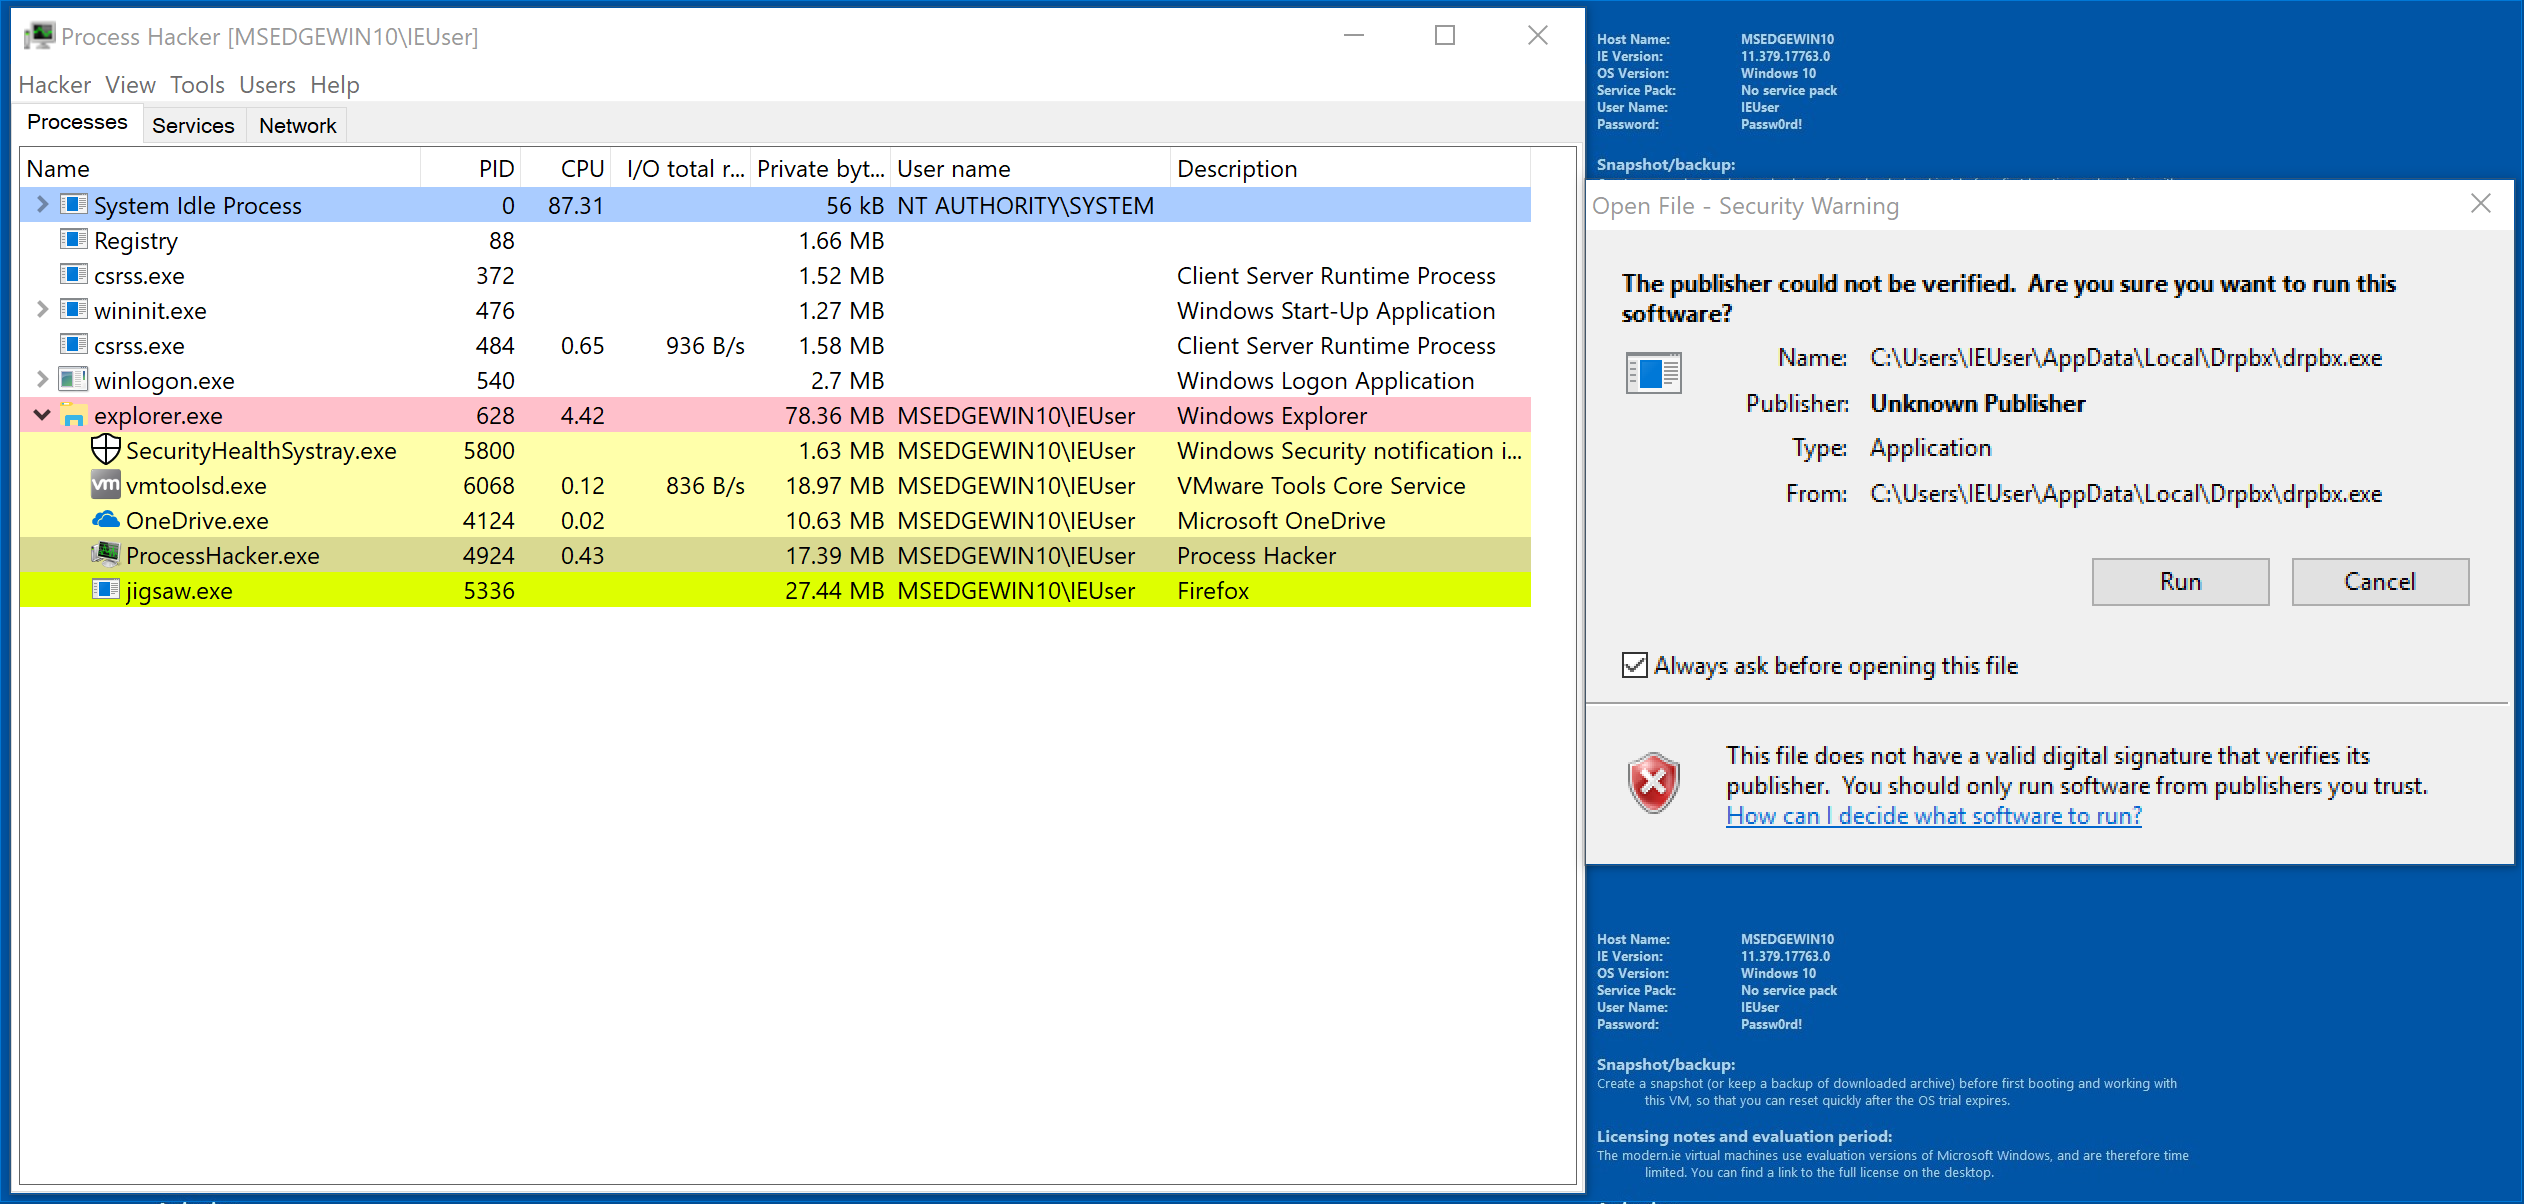
Notice that jigsaw.exe has appeared a child process of explorer.exe. Interestingly, the Description says Firefox. Click run and let’s see what happens.
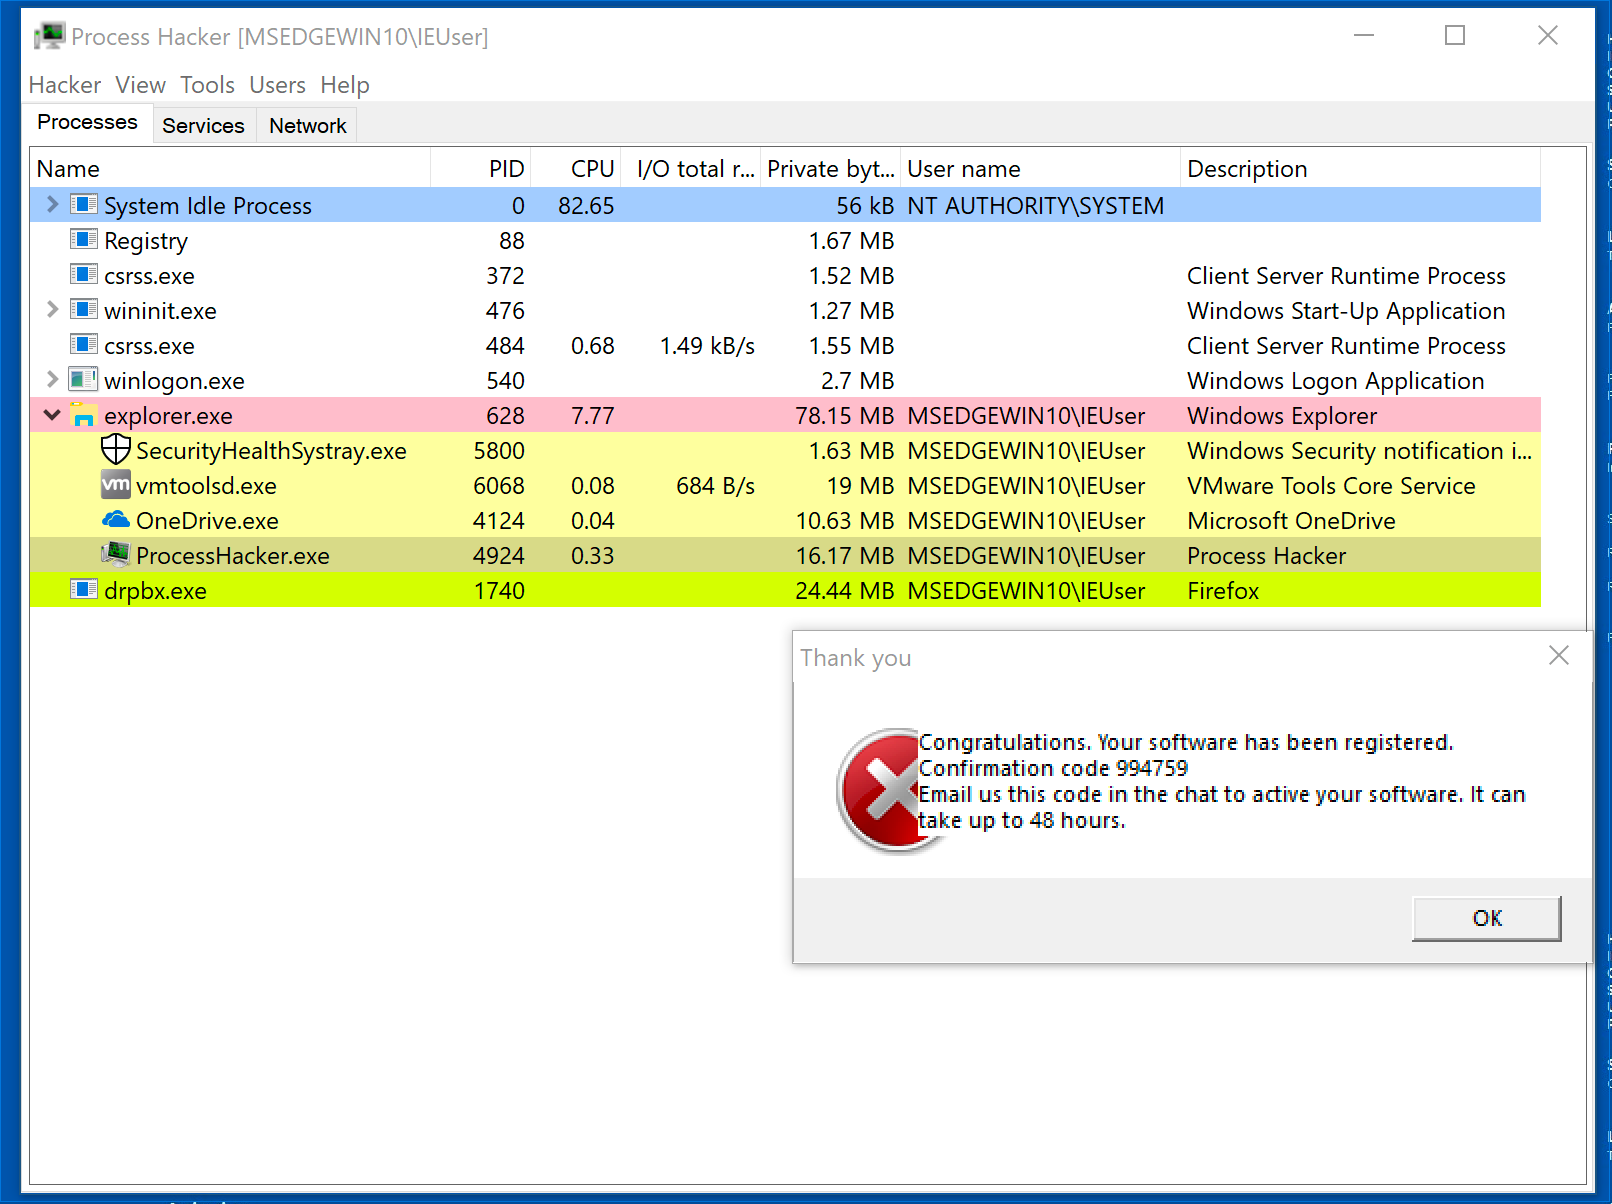
Now that Jigsaw is running, it seems to have changed its name to drpbx.exe. Remember that we saw drpbx.exe in PEStudio using its strings functionality.
ProcessHacker Strings
Let’s examine Jigsaw’s strings while its running in memory. You can view the strings for a process’s memory by right-clicking the process in ProcessHacker and then selecting Properties. The properties window will appear. You can view the strings by clicking the Memory tab and then clicking the Strings button in the top right. Click OK when the prompt appears.
Let’s see if we can find the string for drpbx.exe. You can try scrolling through or because we know what we are looking for:
- Click filter
- Select contains
- Type drpbx.exe in the prompt and click OK
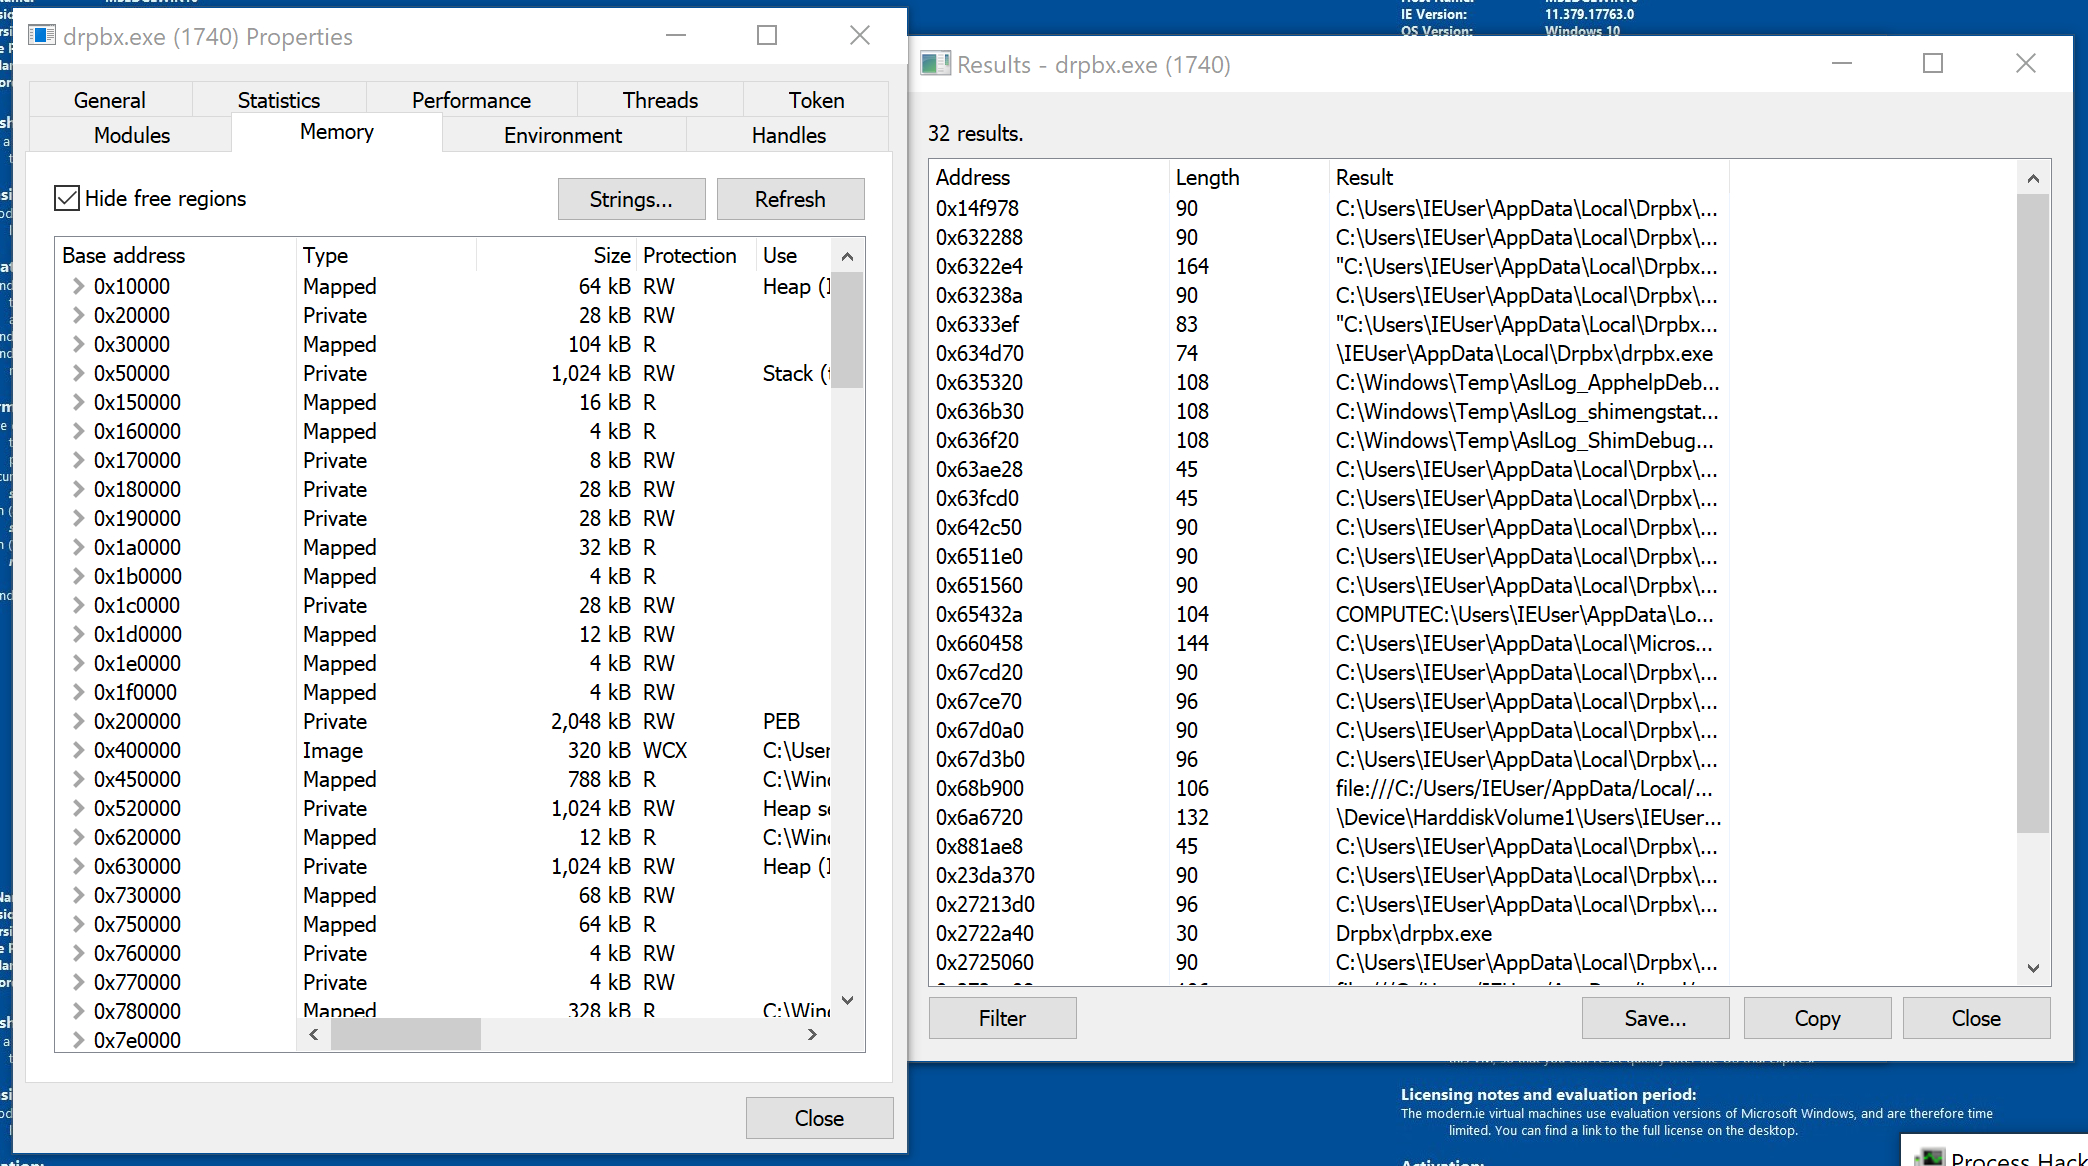
Revert the windows VM to pre-execution state again. Let’s examine Jigsaw using Procmon.
Using Procmon
Open Procmon by double-clicking Procmon.exe.
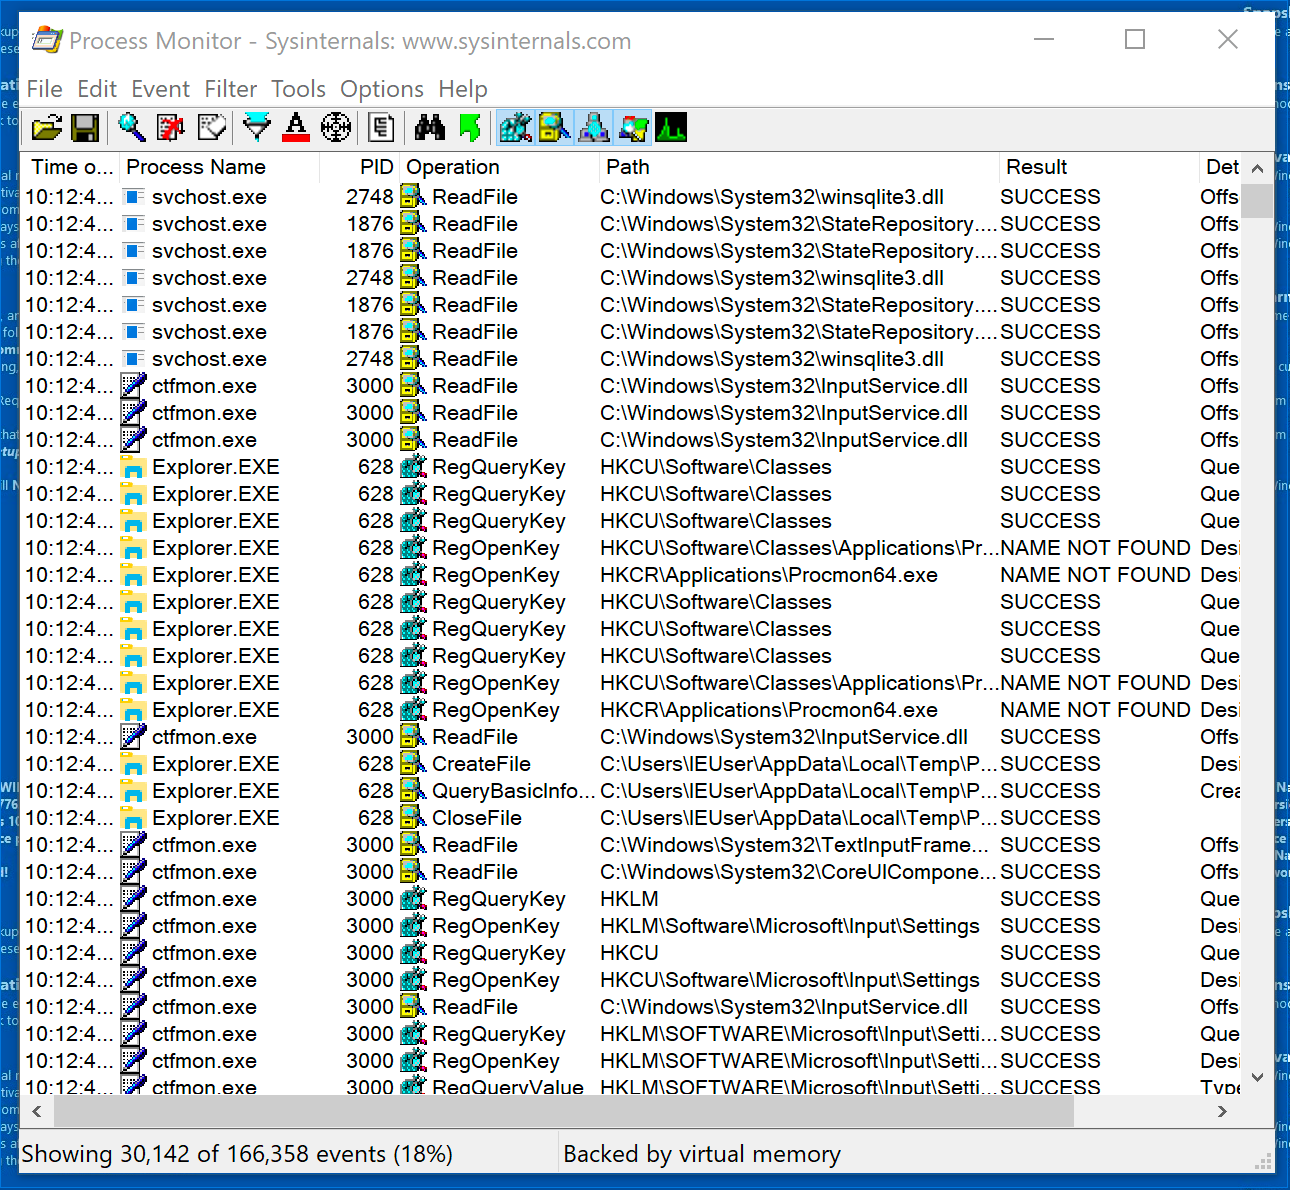
Procmon can be extremely busy, so its important to filter and control its output. You can turn Procmon’s capture functionality on and off by clicking the Magnifying Glass icon on the top of the screen. Go ahead and turn it off now.
You can clear the existing output by clicking the button that looks like a page with an eraser on it (mouse over the icons if you are having trouble). Go ahead and clear the results.
Now that we’ve cleared out the existing output, turn the capture back on and run Jigsaw.
Next, let’s filter the results by clicking the icon below.

Once you click the filter button, you’ll be presented with the screen below.
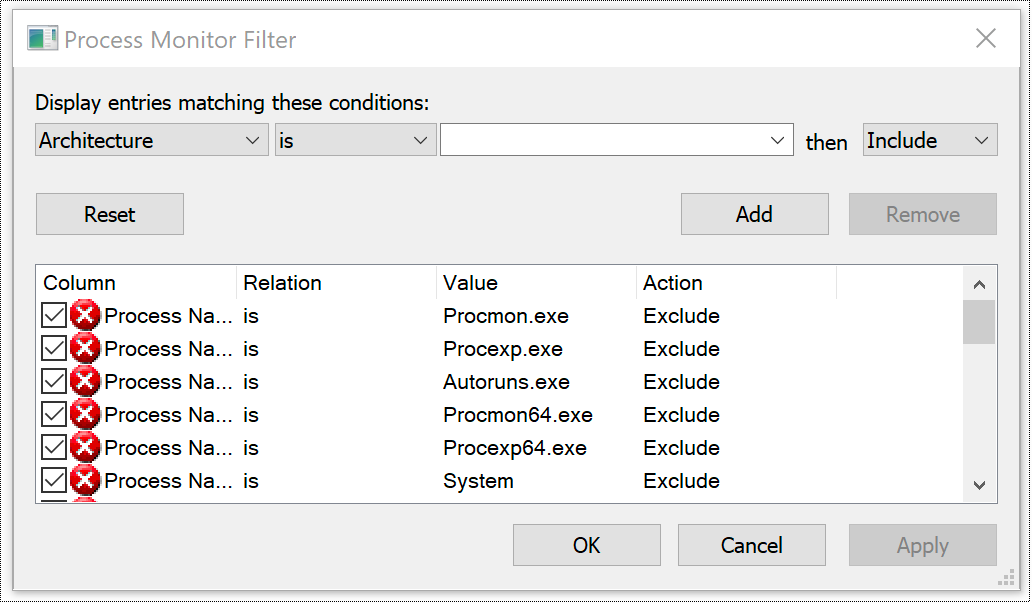
Click the drop-down that says Architecture and change it to Process Name. Next click the empty drop-down, select drpbx.exe, and click Add.
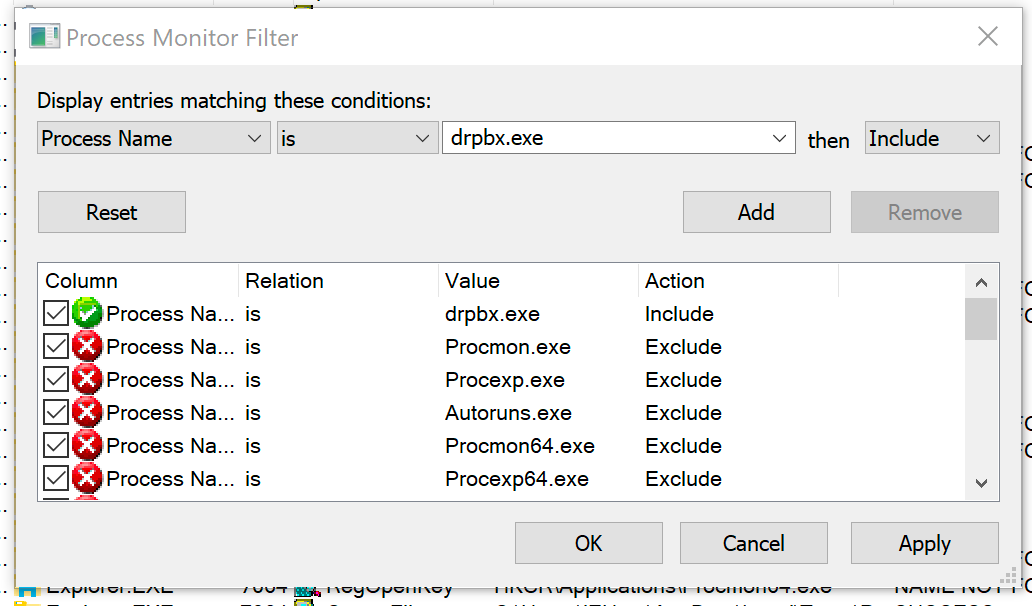
Click Apply and then OK. You’ll notice that the output has been filtered to only include drpbx.exe operations.
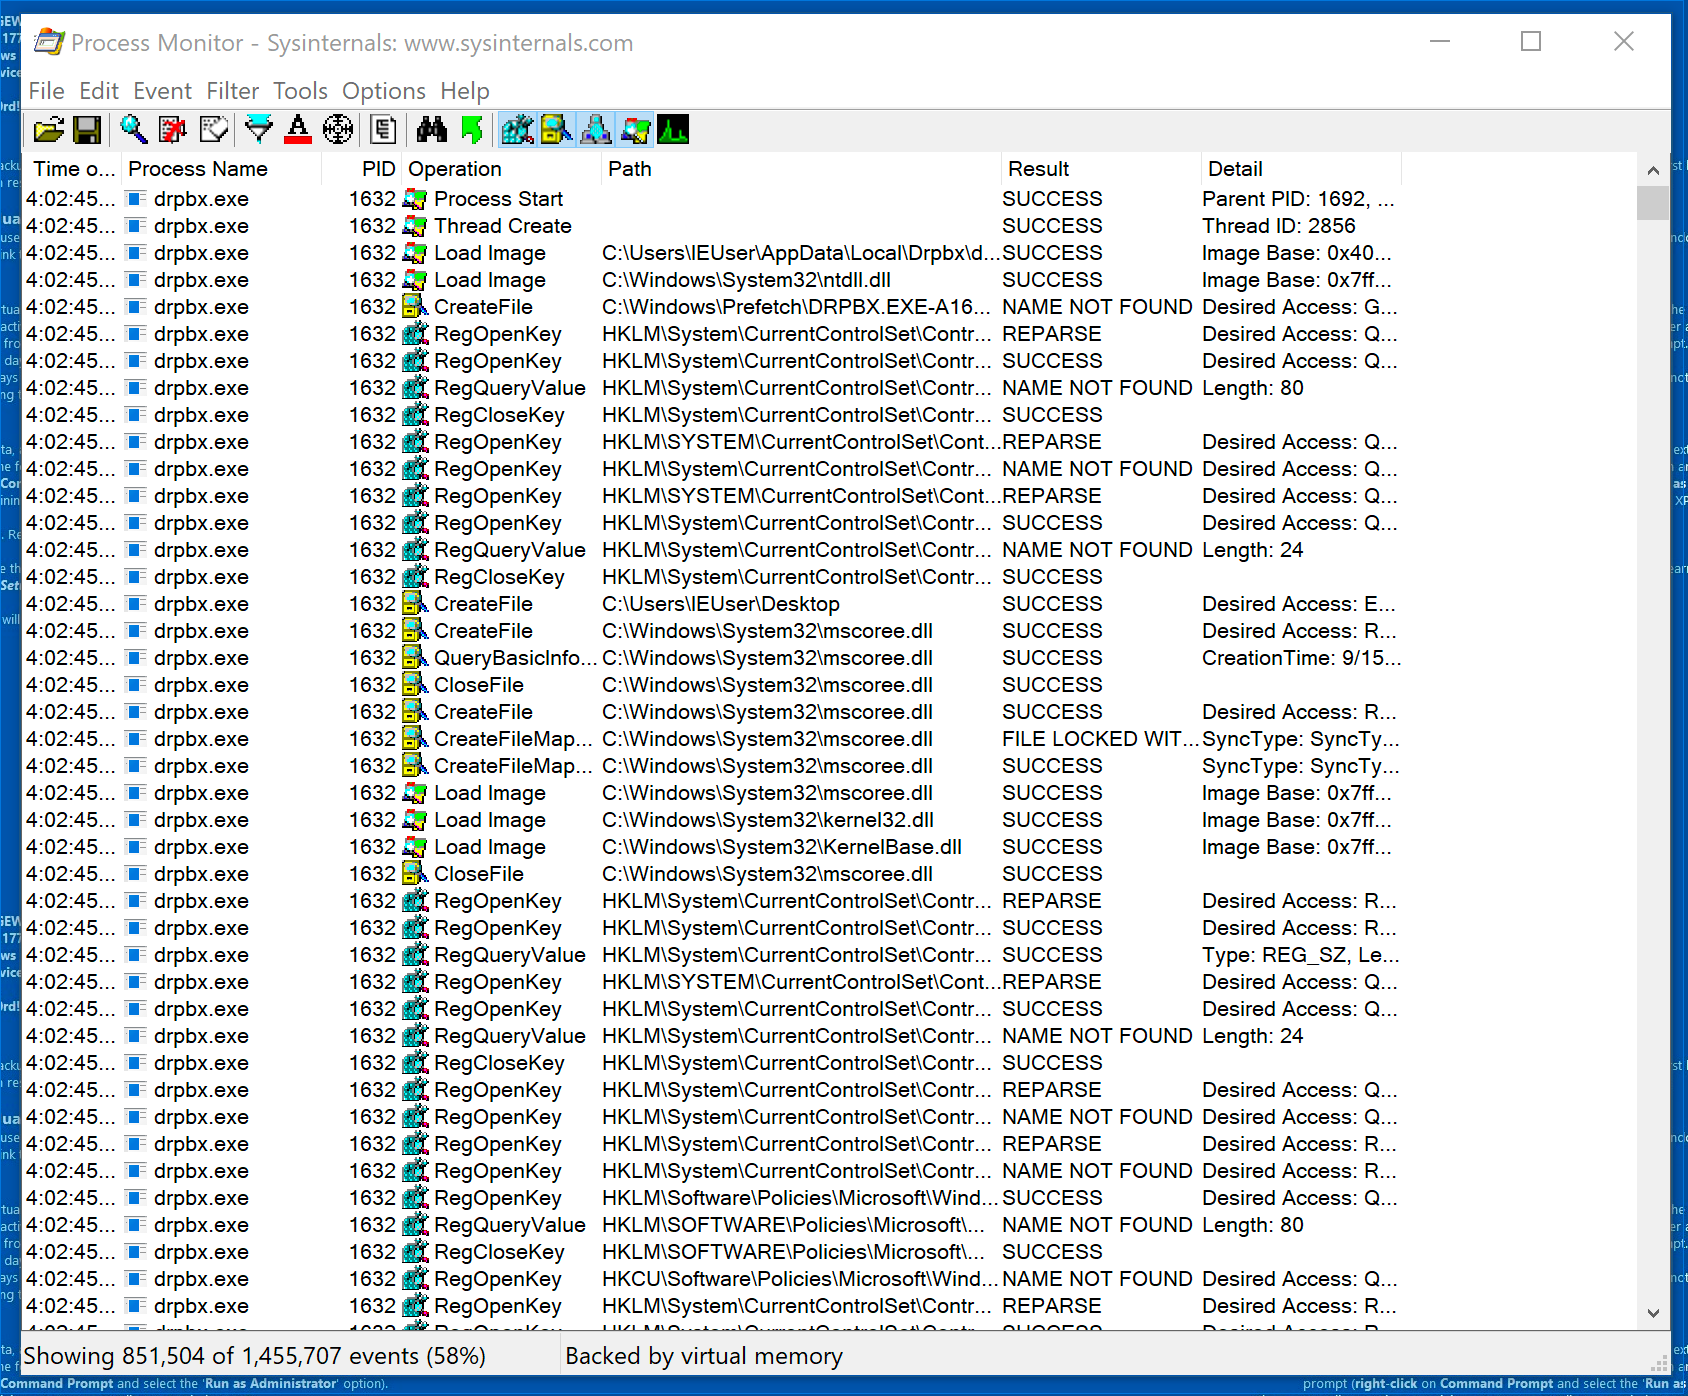
Obviously, there’s still a ton of output. Let’s look at some of the operations.
Process Operations
- Process Start
- Thread Create
- Load Image
File System Operations
- CreateFile
- QueryBasicInfo
- CloseFile
- CreateFileMap
Registry Operations
- RegOpenKey
- RegQueryValue
- RegCloseKey
Procmon can filter based on operations as well. Let’s look at the files that Jigsaw has written. Click the filter button again and filter by Operation is WriteFile. Click Add, Apply, then OK.
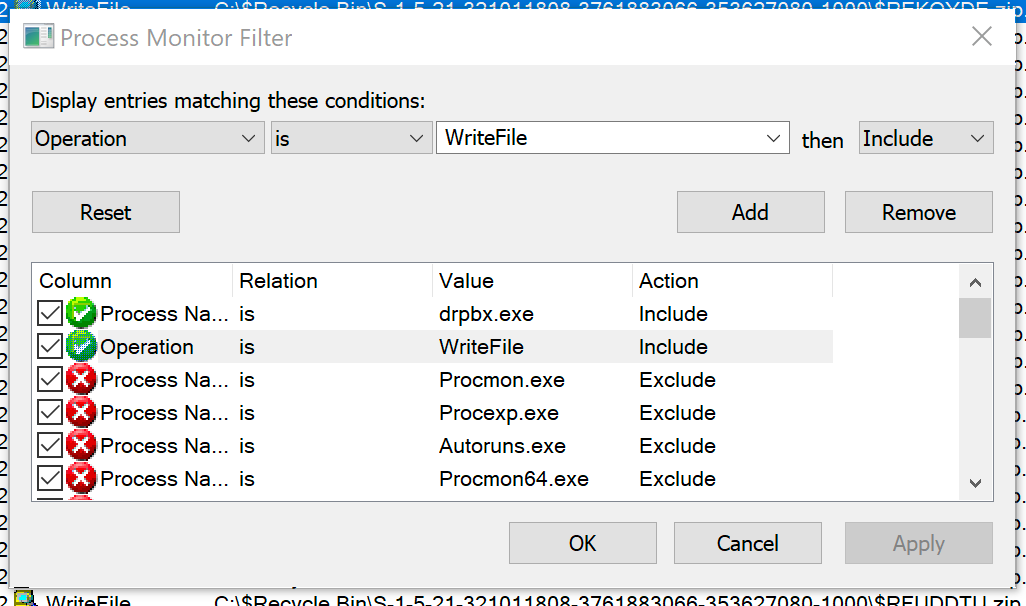
Look through the output.
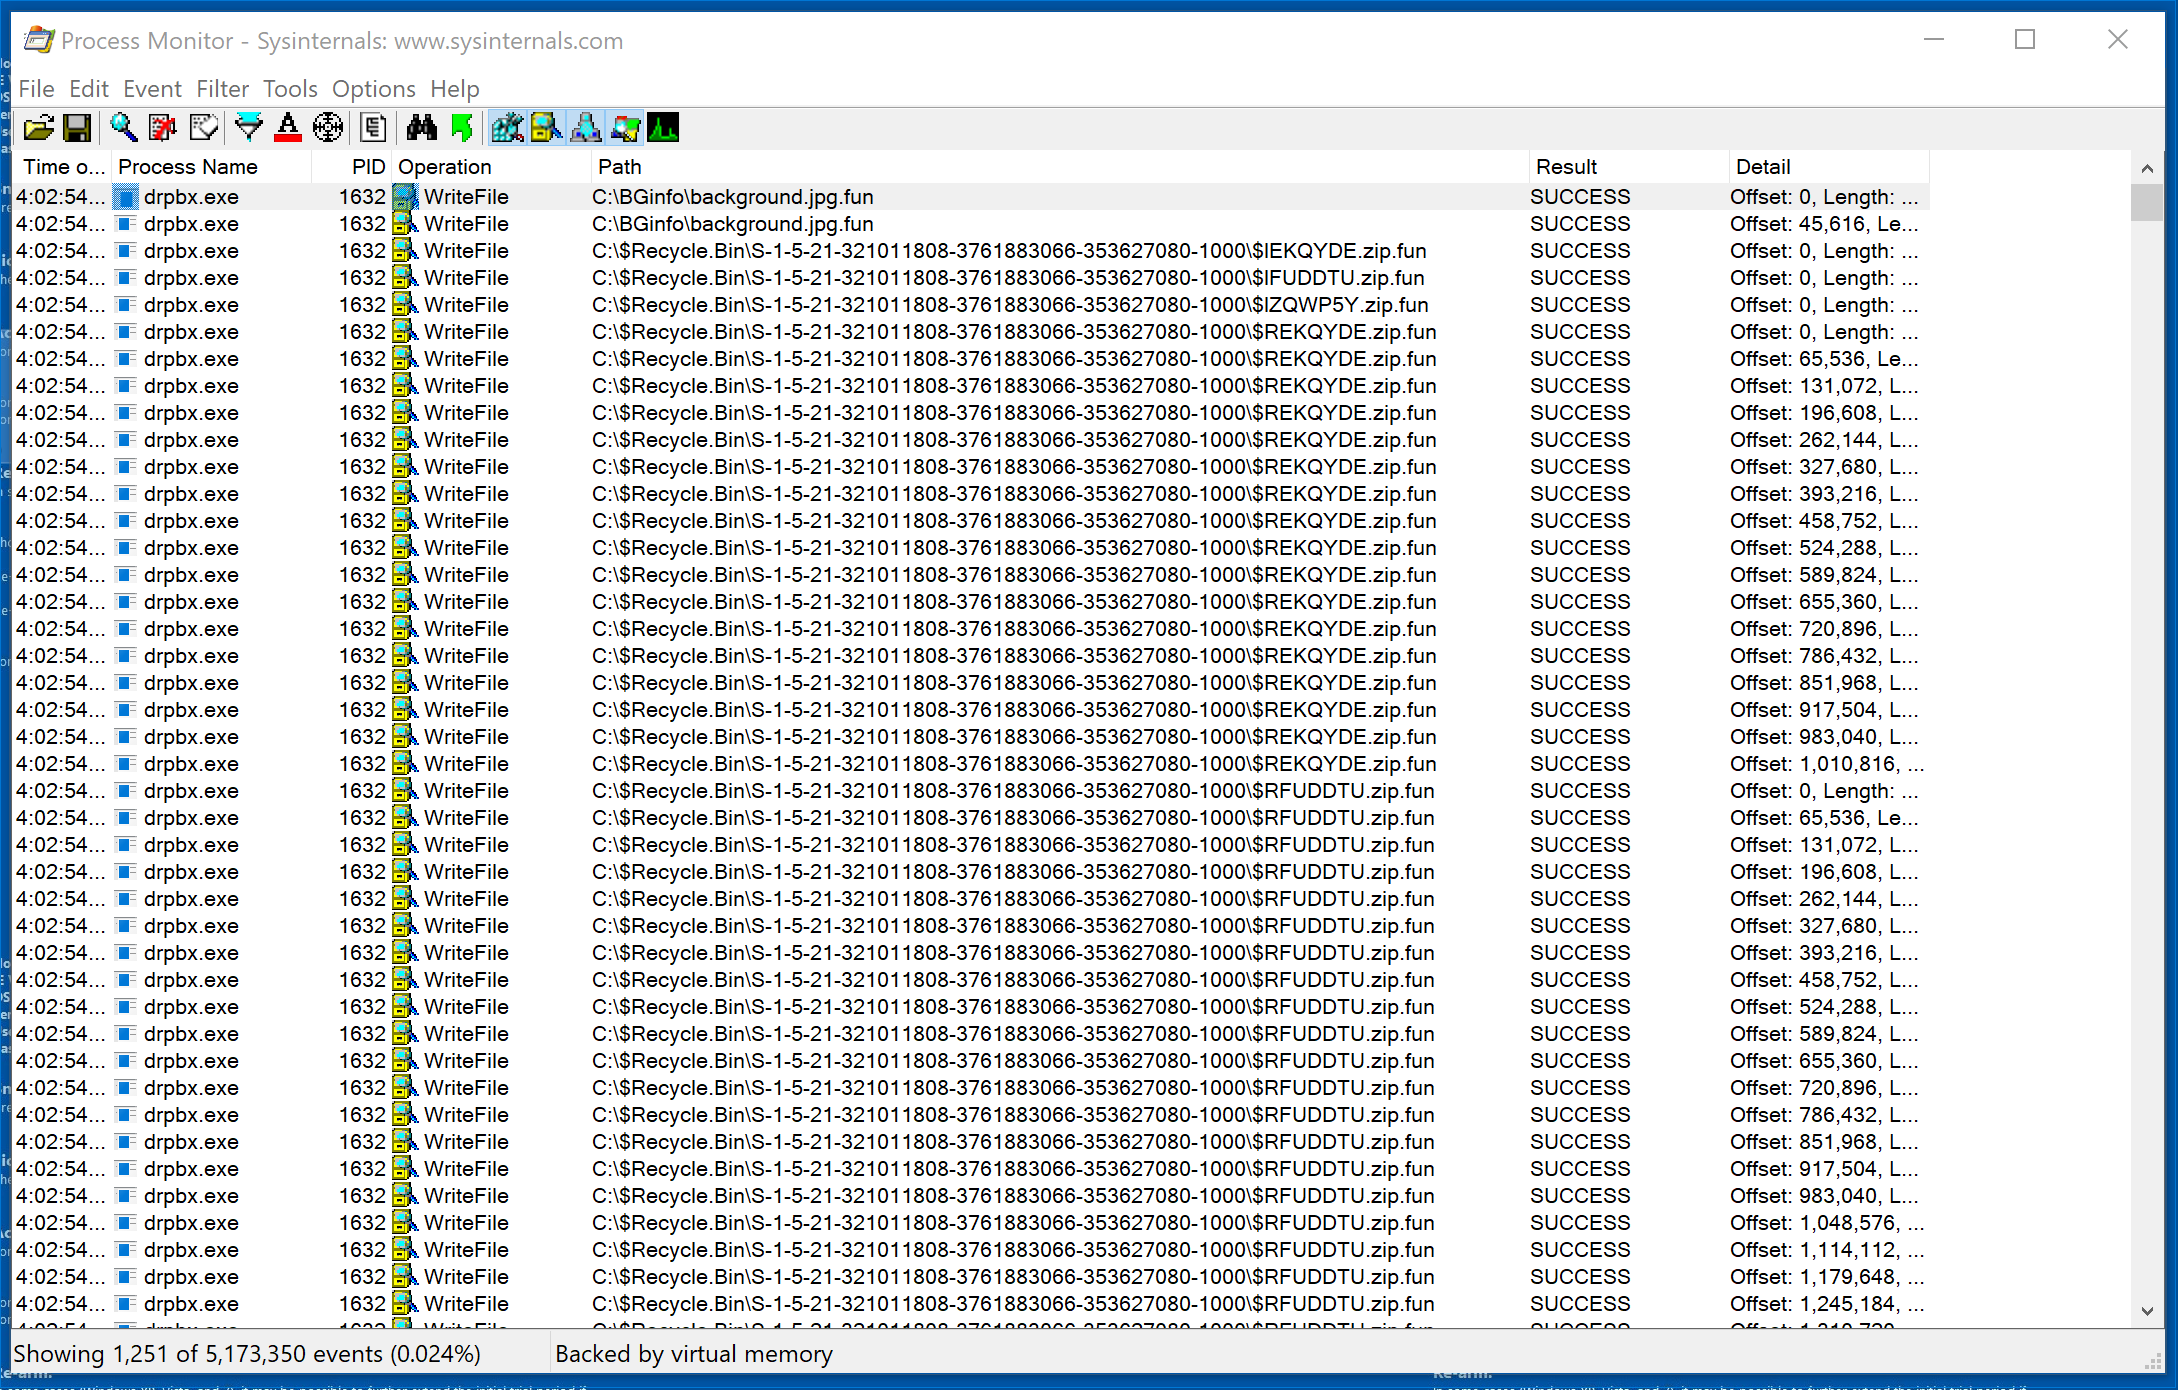
Notice all of the entries that end in .fun. Let’s examine the first entry in explorer.

Notice that only one file has the suspicious .fun extension. Examination reveals that the .fun extension represents files that Jigsaw has encrypted. Go back to Procmon and scroll through the output.
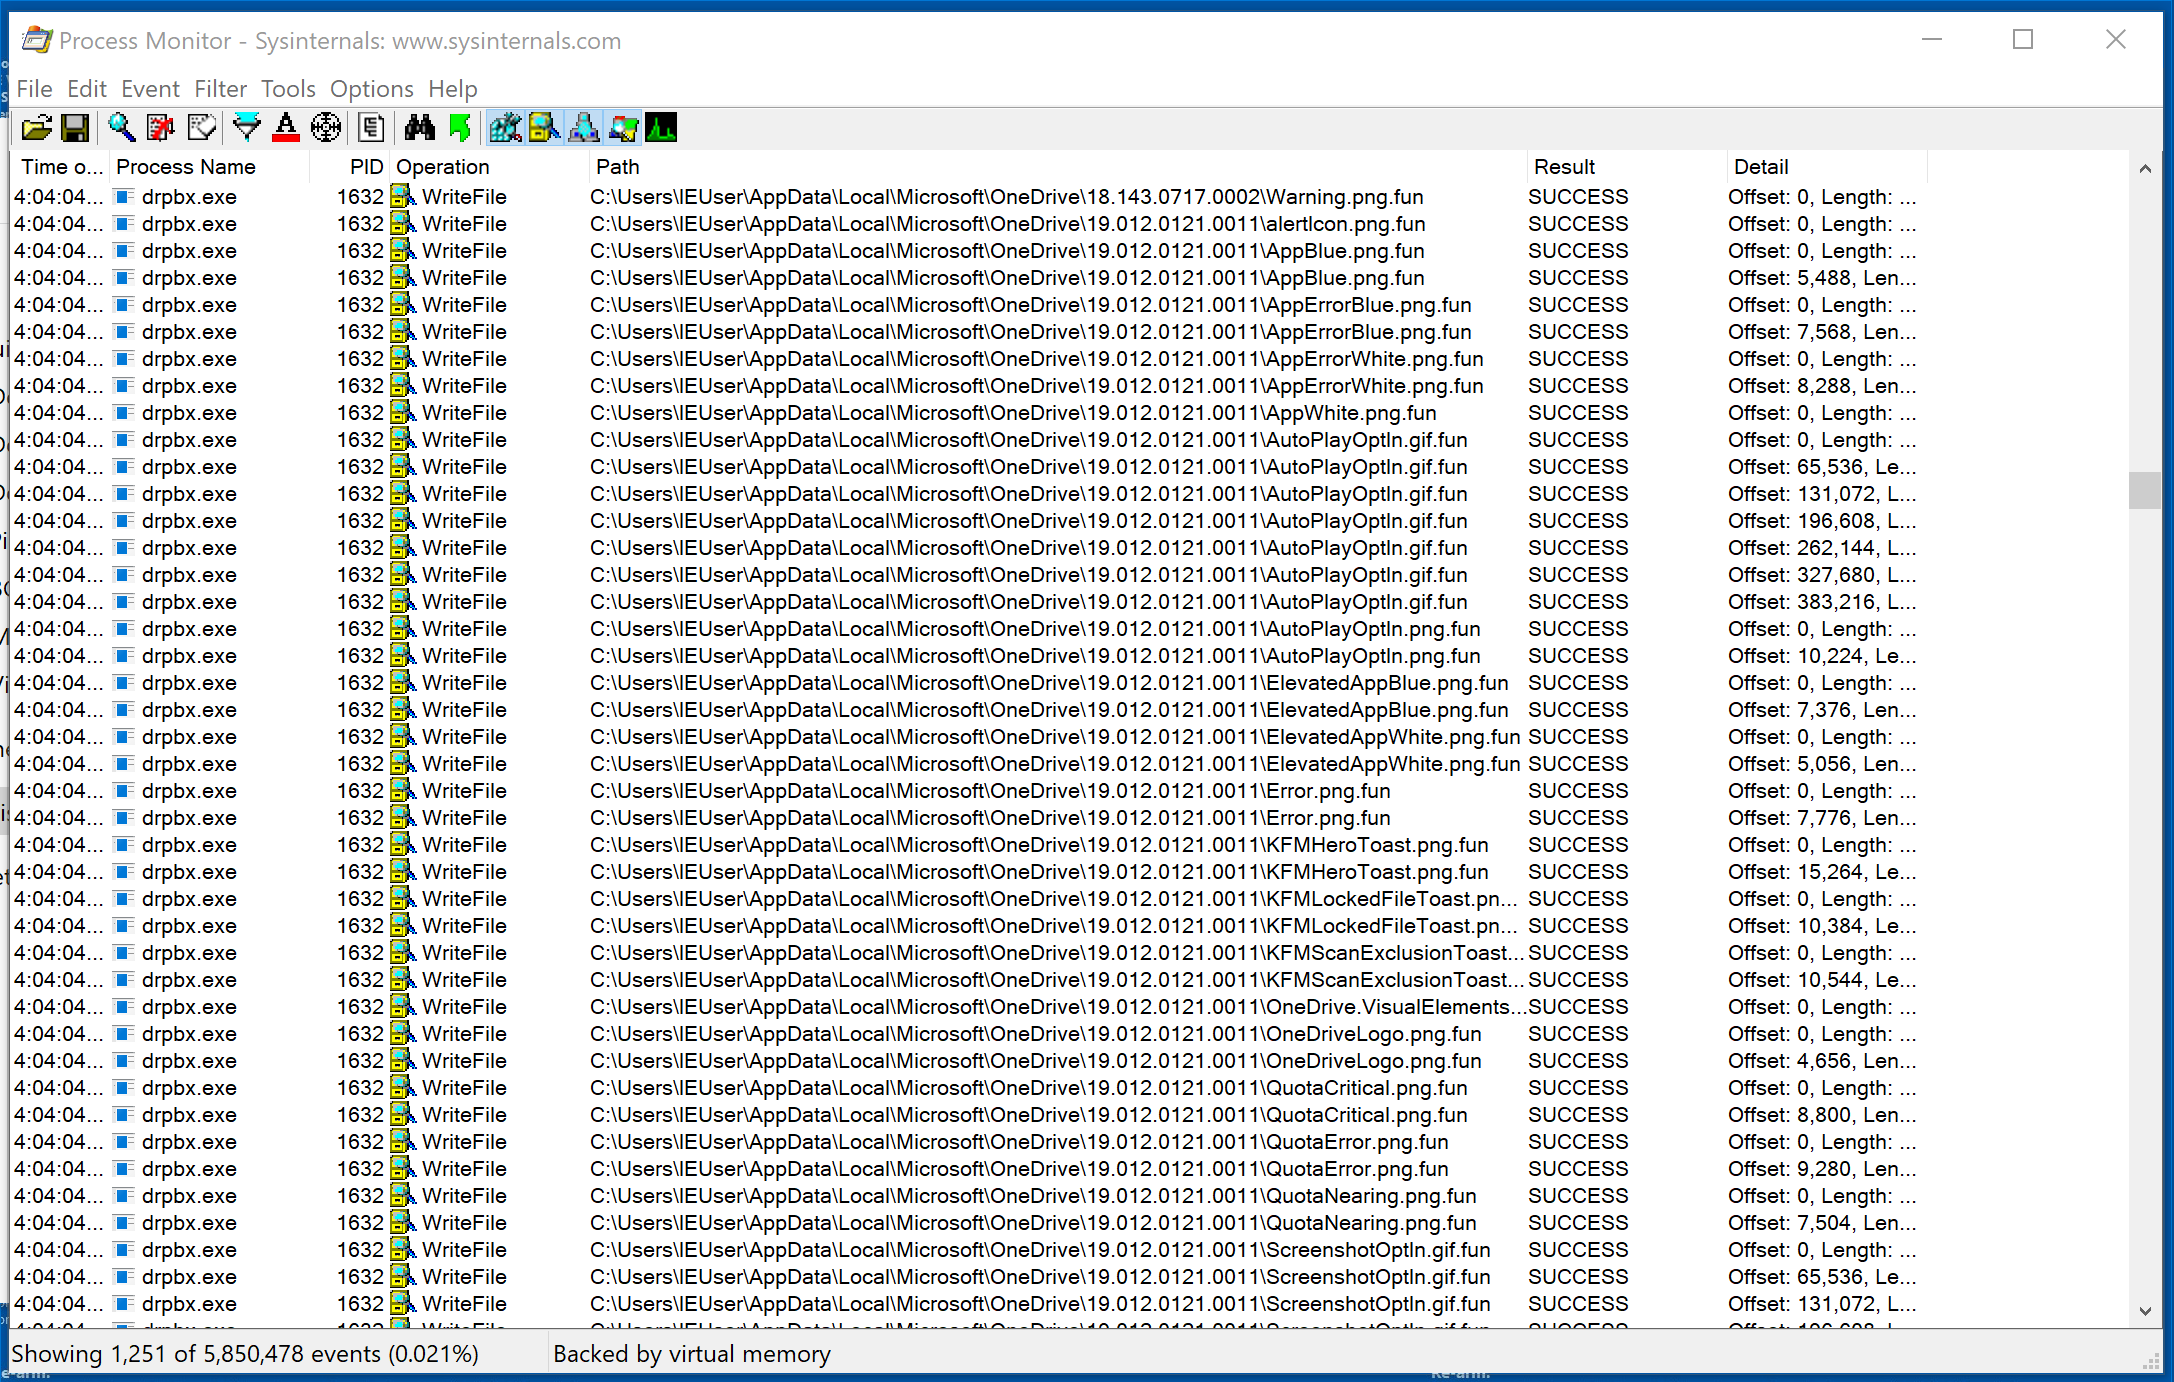
Scrolling through the output, we can see that Jigsaw appears to only encrypt certain file types.
Observed Encrypted File Types:
- .jpg
- .zip
- .png
- .txt
- .gif
- .xml
- .db
- .dat
- .svg
Observed Skipped File Types
- .exe
- .cfg
- .ps1
We haven’t looked over everything, but at this point we’ve observed that Jigsaw exercises some level of discretion when encrypting files.
We’ve only begun to scratch the service of the information that Procmon collects. Take a few minutes and look around at some of the other operations before you move on. In the next post we’ll continue with dynamic malware analysis by examining network connections.