In Introduction to Malware Analysis: Part 1 and 2, we analyzed a sample of the Jigsaw malware. Today, we’ll continue with the malware analysis study by examining network connections. During our analysis, we’ll make use of the same environment that we did in the last two posts.
Setup
For this lab, we’ll use the Remnux VM from Learning Cyber 1 and a Windows VM as the victim. For this lab, I ran a Flare VM for my Windows Victim VM, but you could use the same Windows VM from the previous posts.
If you want to use the same VM as me, go here and follow the instructions. Flare is a set of packages for Windows to make Malware analysis easier. You’ll need a Windows VM to install Flare on. I used the Windows 10 VMware image from here. For those of you paying attention, it’s the same image we used for the initial Windows VM in Learning Cyber 1. For my setup, I reverted my snapshot back to a clean state and followed the instructions on the flare-vm github page posted above.
Remnux VM Setup
In the Remnux VM, open a terminal and type
accept-all-ips start
The above command is an alias (unique to Remnux) that does some IPTables manipulation to set Remnux up to accept any IP that comes to it. IPTables is the Linux Firewall. Remember UFW from Learning Cyber 1? UFW is a tool used to easily configure IPTables. IPTables are the tables that actually make up the Firewall rules for the Linux kernel, but they can be difficult for a novice user to manage. UFW provides an easier way to manage IPTables. For more information on IPTables, go here.
OK, so why are we doing this?
By default, most operating systems will only accept network traffic destined for the IP address that’s assigned to that host. It’s pretty similar to how snail-mail (Traditional mail with envelopes etc.) works. When you get a piece of mail addressed to someone else, you’re supposed to send it back (assuming that you are a law abiding citizen). We are setting Remnux up to accept mail (network packets) that are addressed to anyone. We need Remnux setup this way because we want to make it look like a) any malicious server that Jigsaw reaches out to and b) a DNS server.
FakeDNS
In order to get Remnux to respond to DNS, we need to run FakeDNS. Open a terminal and type
fakedns
This will start the FakeDNS program. While FakeDNS is running, Remnux will respond to any DNS request and say that the domain points to the IP address of our Remnux VM. You’ll likely see a lot of things pop up while running FakeDNS. Most of the DNS requests are for Microsoft Telemetry services, so you can ignore them.
You’ll need to leave FakeDNS running in this terminal during the analysis, so make sure you run any other commands in another terminal window.
InetSim
Lastly, we need to setup Remnux to respond to any HTTP/HTTPS requests that are sent to it. InetSim is a program that simulates network services like HTTP/HTTPS. To run InetSim, type
inetsim
Like FakeDNS, InetSim will need to run the whole time during the engagement, so make sure to run any other commands in a different terminal window.
Windows VM Setup
Whether you use Flare or the original Windows VM, make sure that it’s set to Host-Only mode. Next, if you’re on the original VM, make sure that the Windows Defender settings are turned off (see the previous Learning Cyber posts if you’ve forgot how).
Networking
While Remnux is setup to receive and respond to DNS and HTTP/HTTPS traffic, Windows isn’t going to just send all of its traffic that way without some configuration.
To make Windows send it’s traffic to Remnux, we need to edit the network settings. Hit the Windows key and type Control Panel. To the right of the Control Panel window, select View By -> *Small Icons)
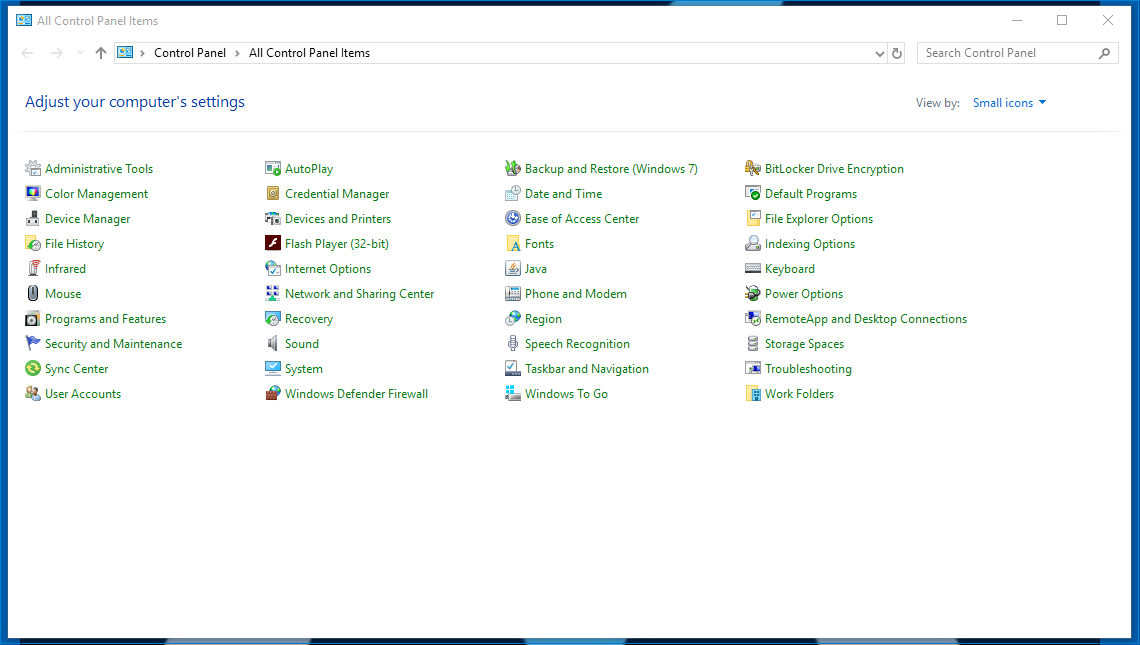
Next, select Network and Sharing Center.
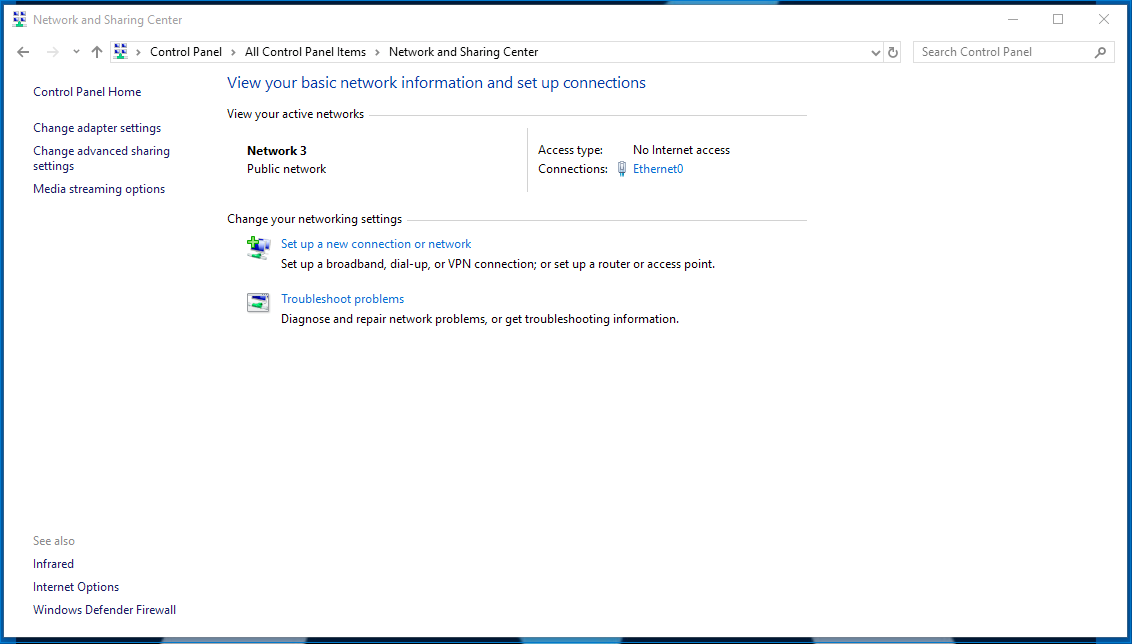
On the left side of the screen, select Change adapter settings.
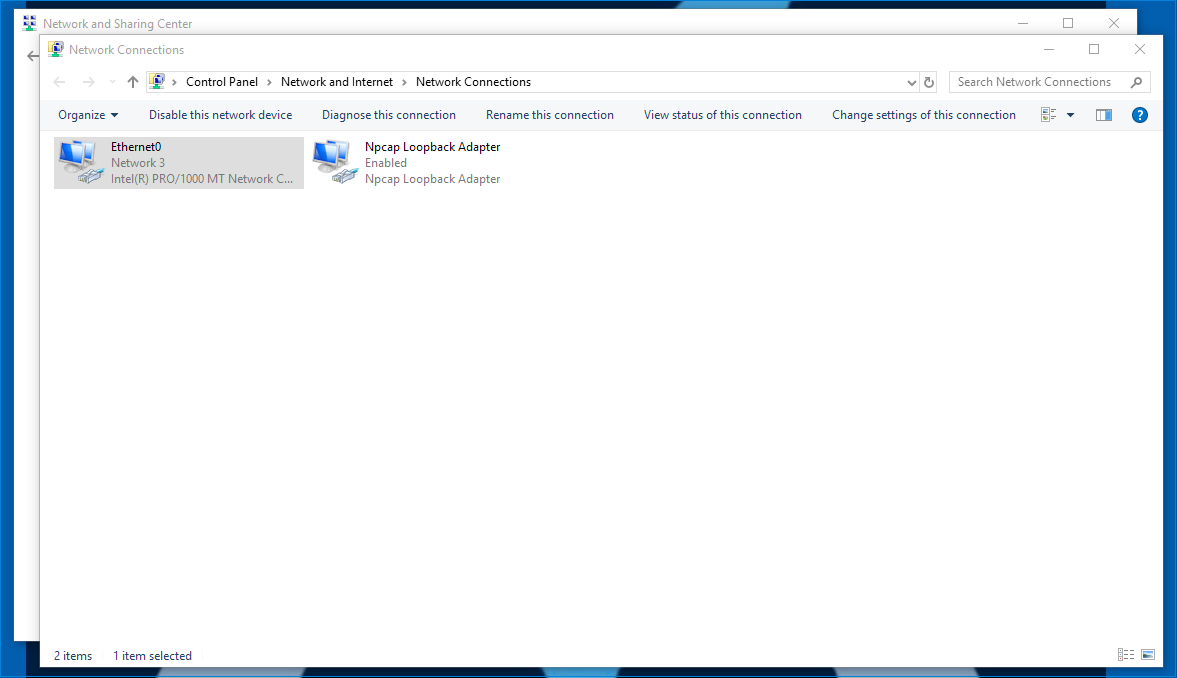
Right click your Ethernet adapter and select Properties.
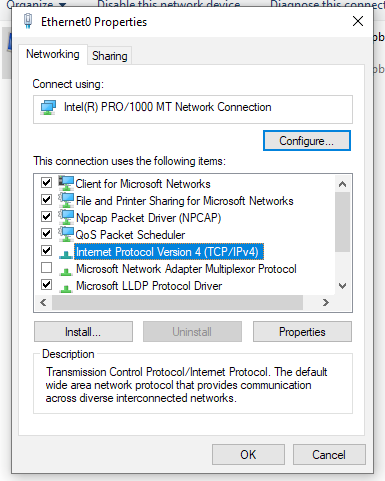
Select Internet Protocol Version 4 (TCP/IPv4) and click Properties.
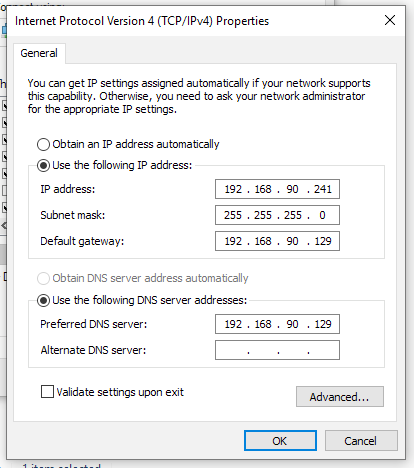
Lastly, fill in the information (like above) substituting 192.168.90.241 with the IP address of your Windows VM and 192.168.90.129 with the IP address of your Remnux VM.
What are we doing here?
We’re adjusting our Windows Network settings to set the Gateway and DNS server as our Remnux VM. This will make our Windows VM send all traffic to the Remnux VM.
Analysis
Now that everything is setup, take a snapshot of your Windows VM. It’s time to analyze Jigsaw, but before you run the malware, go ahead and start a Wireshark capture on Remnux. Once the capture is running, switch to the Windows VM and run Jigsaw.
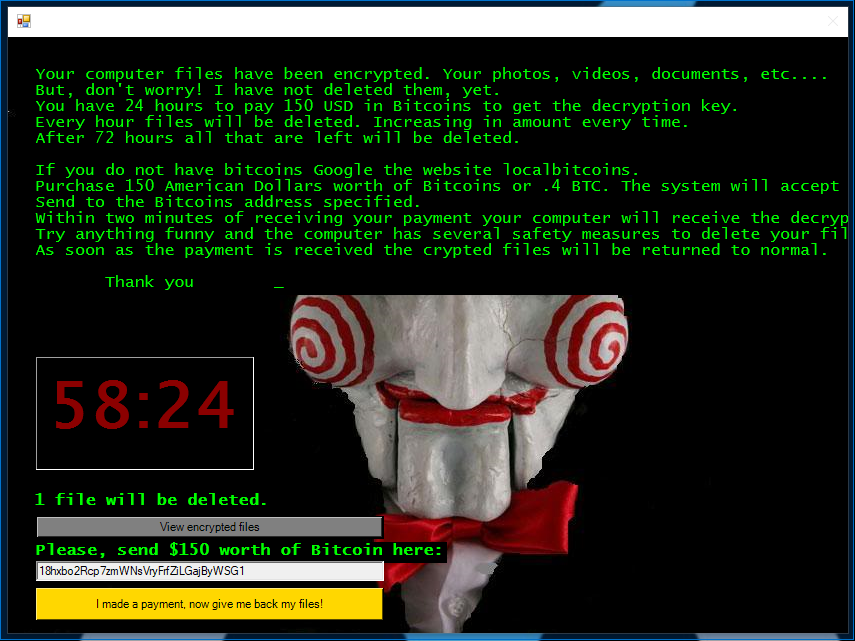
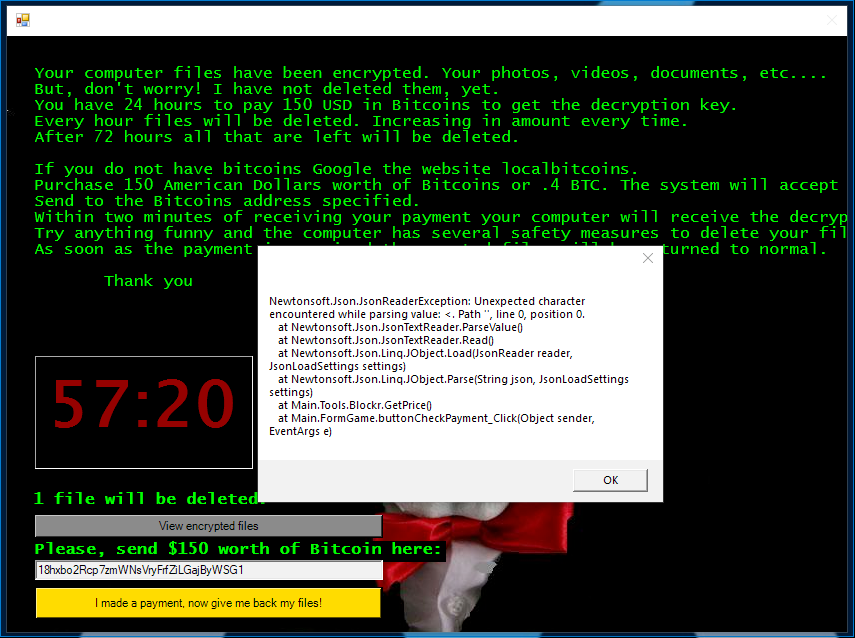
Once the Jigsaw message has completed and you see the screen above, click I made a payment, now give me back my files. You’ll get an error, but that’s OK.
Switch over to the Remnux VM to evaluate any network traffic. Stop the Wireshark capture. Let’s begin the analysis with the FakeDNS terminal.
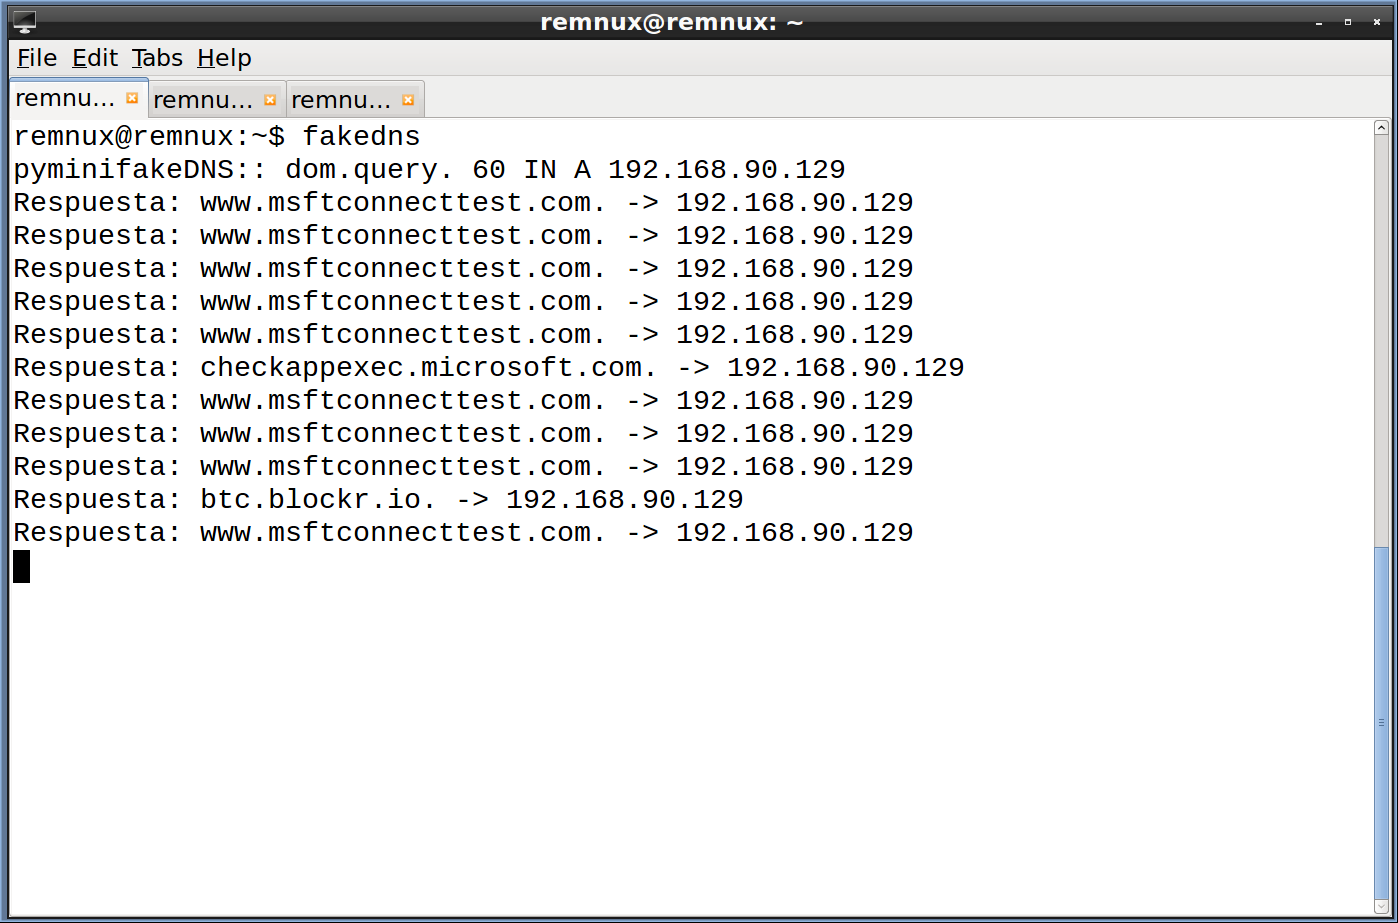
We see a lot of Microsoft related content, but you should also notice one entry that stands out btc.blockr.io. Let’s examine that traffic in Wireshark.
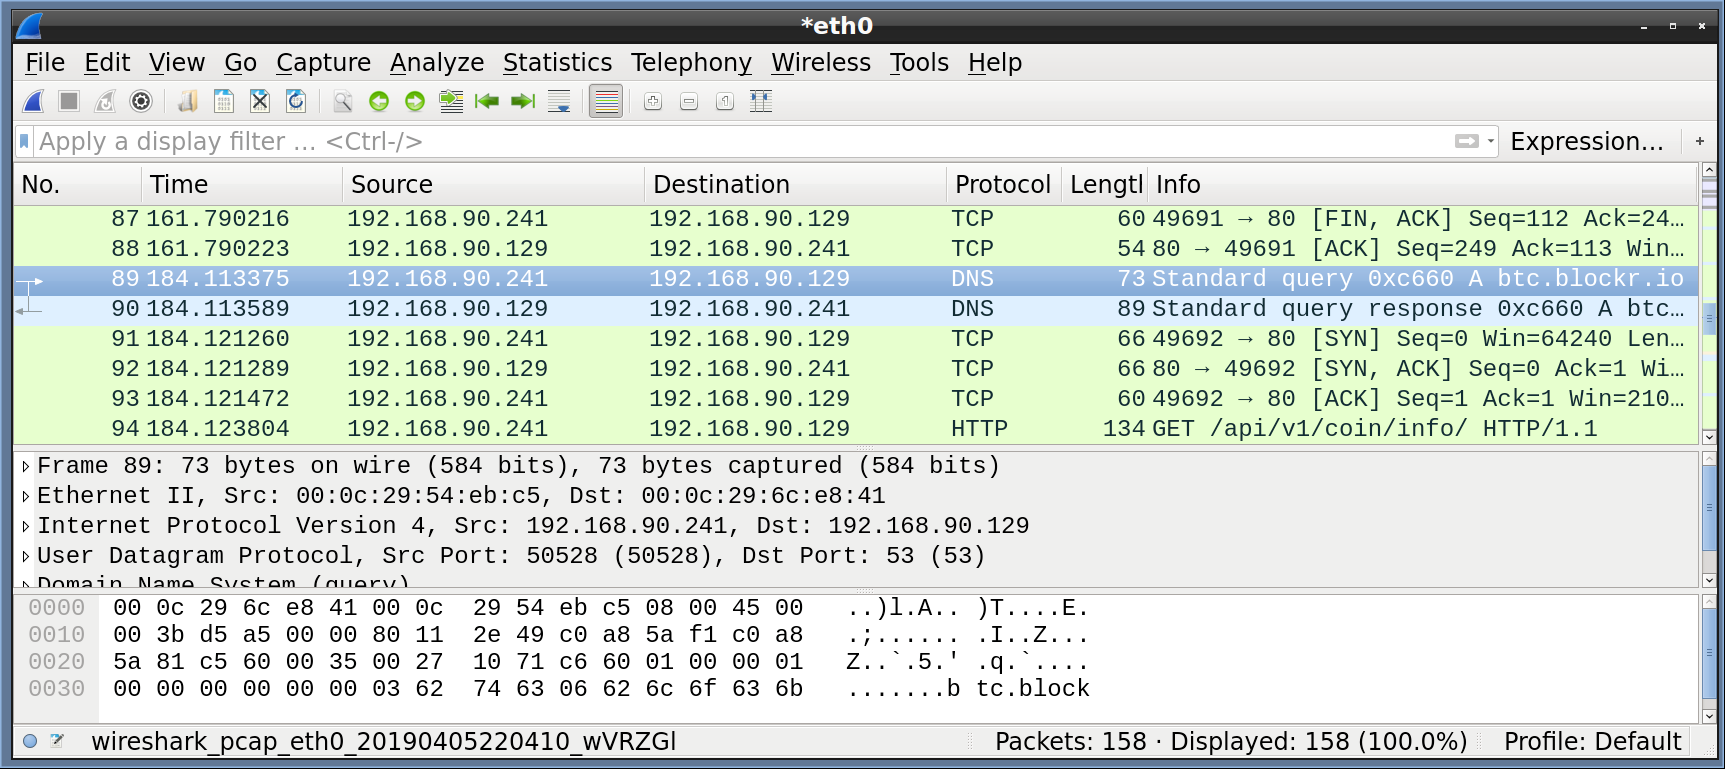
Scroll through the Wireshark output until you see the DNS request for btc.blockr.io (see above). As expected, we can see that our Remnux VM responded to the DNS request with its own IP address.

The next few packets after the DNS request show Jigsaw making a connection (SYN -> SYN, ACK -> ACK) to the Remnux VM.
Next, we see an HTTP GET request (Highlighted above).
Right click the GET request and select Follow -> TCP Stream).
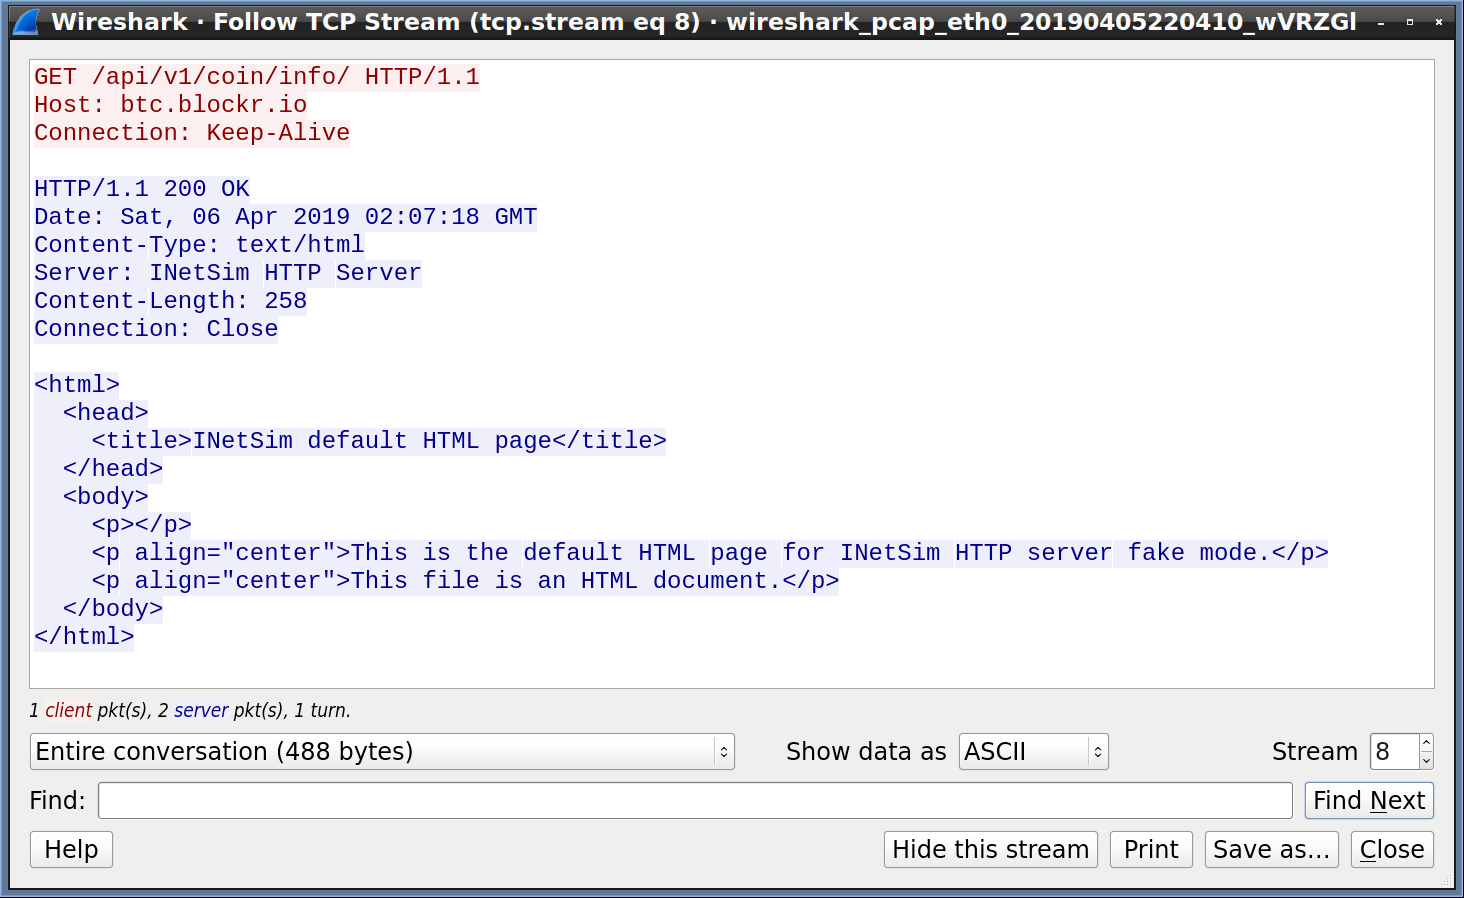
In the above image, we can see a GET request to /api/v1/coin/info but not much else. Unfortunately, InetSim is a fairly simple simulator and is only setup to respond with a generic page. If we look back at Jigsaw (see below), we’ll see that it didn’t get the response it was looking for, so it thinks that there isn’t an Internet connection.

In this post, we setup the ground work for performing some basic dynamic malware analysis of network traffic. Unfortunately, we didn’t see much traffic from Jigsaw using this approach, but we did learn another piece of the puzzle. Specifically, we learned that Jigsaw reaches out to btc.blockr.io/api/v1/coin/info when the payment button is pressed. In future posts, we’ll dive deeper into dynamic malware analysis of network traffic, but at this point you should have a couple tools in your tool-belt to get you started. Go ahead and try your hand out at a couple of the other malware samples in theZoo on your Kali VM. If you have any questions, feel free to reach out!